[ad_1]

I’ve had this white boucle storage ottoman for a few years now. And over time, it had become pretty dirty. Having a kid and a dog will do that. So when I moved it into my son’s room, so he would have more toy storage and a place to sit, I thought I’d freshen it up and reupholster it.
The circular shape made it a little more difficult than my last upholstery project (this DIY headboard), but it’s totally doable! And now that it’s done, I’m so glad I made the effort.
If you’re curious to try something similar, and repurpose a piece you already have, click through for the tutorial.
Here’s what the ottoman looked like before (below). It had a bunch of stains at the bottom and just looked really worn out.

But other than its appearance, it was still very useful. Here’s how I reupholstered this round ottoman in an afternoon…
Reupholstering a round ottoman
For this project, I used a similar approach to this DIY storage ottoman from a while back. But the shape is quite different and I used a staple gun for the majority of the process. So, with that in mind…
Start by ironing the fabric you plan to use. This goes for the lid fabric as well as the base fabric. I used the last of my scrap linen fabric from when I recovered my arch headboard.
Sewing the round lid cover
1. To get the proper shape for the rounded lid, without removing the fabric that was already on the ottoman, took a couple extra steps. But it didn’t seem worth it to remove the existing fabric, so I left it on.
Starting with the round shape, I put the fabric under the ottoman and traced all the way around. *The circle piece of fabric for the lid is supposed to be a bit smaller than the full dimensions of the ottoman, so that gave the seam allowance I needed as well. Seam allowance was and extra 1/2 inch all the way around.

2. Cut the traced circle out (which includes the seam allowance) and then fold the circle in half and then fold it in half again. And then trim all the way around the edges again ever so slightly, to make sure it’s a perfect circle all the way around.
3. For the side piece that attaches to the circle, I cut it 2.5 inches wider than I needed it to be, all the way around. This was so I would have plenty of extra fabric to pull around underneath and staple it in later. And then I made it as long as possible, the length of the piece of fabric I had.
I still ended up having to add another strip (which I sewed together before the next step) because my fabric wasn’t long enough. So there are 2 seams on the side, instead of just one that joins everything together.

4. Then pin the right sides of the fabric together (RST) – circle and side pieces all the way around the circle. Use plenty of pins to avoid puckering (see photo for how many I used as an example).
5. Now it’s time to sew! I asked my mom to sew this part for me because she is much better at sewing than I am.
Sew the two fabrics together all the way around, keeping the half inch seam allowance. The sewing foot of the sewing machine that was used is roughly a half inch, so that was used as a guide. You can do whatever you like to maintain the allowance, obviously.
6. Check to make sure what you just sewed looks correct, by fitting it on the ottoman lid. And make note of where the beginning and the end of the side fabric will need to meet. Then remove from the ottoman and sew those two ends together.

Attaching lid cover
1. Now that the sewing is complete for the lid, press the seams open / flat with an iron, all the way around. And fit over the top of the ottoman lid.
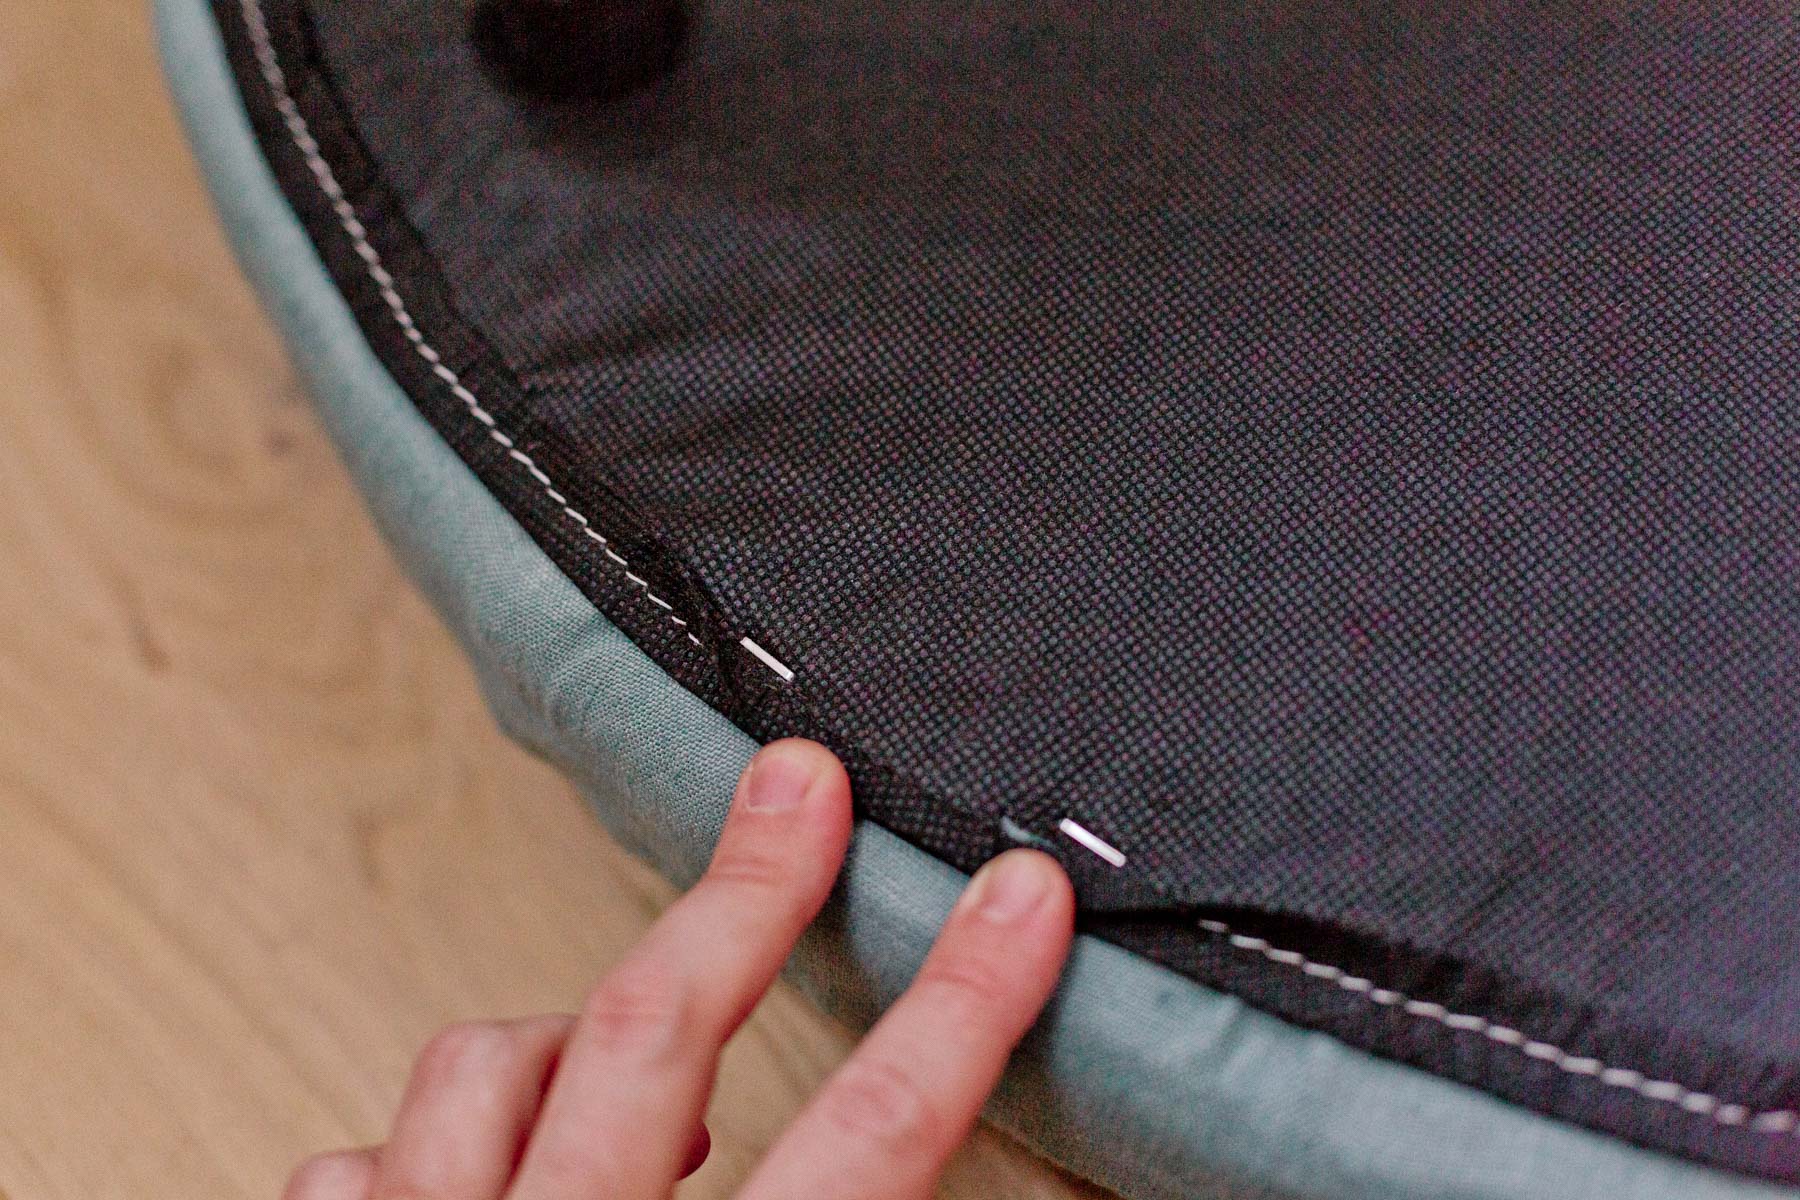
2. On the underside of my ottoman, there was already a backing fabric, so I pulled the staples out of the backing to staple the ottoman lid cover.

3. And then I stapled the cover back over it when I was done. The way I did it, you can’t see any of the staples underneath the lid. They’re hiding underneath the lip of the backing fabric, where the stitches are.
Recovering the bottom of the ottoman
1. This part of the project was the easiest. I started by measuring all the way around the base of the ottoman, to get dimensions. And then added in the dimensions for the inside of the ottoman. Then, cut my fabric down to size. I added 3-4 inches in all directions to my dimensions before cutting, to make sure I’d have enough to wrap around the inside and underneath.

2. Next, I draped the fabric over the base, leaving a couple of inches at the bottom that I could wrap and staple the fabric underneath. And then made sure the remaining fabric was long enough to cover the inside sides of the base. I opted to leave the bottom of the inside as is, instead of reupholstering that part. I didn’t end up having enough fabric to cover that part.
From there, I stapled the fabric to the underside of the base, all the way around, as I was pulling the fabric as tight as possible, to maintain a clean, smooth look.

3. Once that part was secure, I started pulling the fabric tightly to wrap over and into the inside of the base. And used a staple gun again to secure the fabric every inch or two.
This part isn’t perfect – there are some folds and slight bunching at the rim because of the excess fabric. It doesn’t look bad. Just not like a professional upholstery job. When the lid is on you can’t see any of that bunching around the inside rim.
4. Then, I ended up hand stitching together where the two ends of the fabric meet on on the outside of the base, to give it more security and strength.


And that’s it! Is it perfect? Far from it! BUT I’m happy that we can keep it out of a landfill and continue using it for years to come.
It really has been great toy storage for Hayes. And makes for easy room cleanup too – because we can just throw everything in there and close the lid.
[ad_2]