[ad_1]
Most of us believe we are doing everything we can to keep our devices safe, but some of the best security features aren’t enabled or present on your Mac by default, and others require that you make a change and review your operational security from time to time.
Here’s how to fix that in six easy steps.
1
Enable FileVault
All modern Mac computers that use the APFS file system encrypt your data automatically. This has been the case since the days of the T2 chip that first came bundled with Intel processors and is now included in all post-M1 Apple silicon processors. When you turn your Mac on, the decryption key for the internal drive is retrieved from the “Secure Enclave” on boot, and the drive is decrypted, ready to be used.
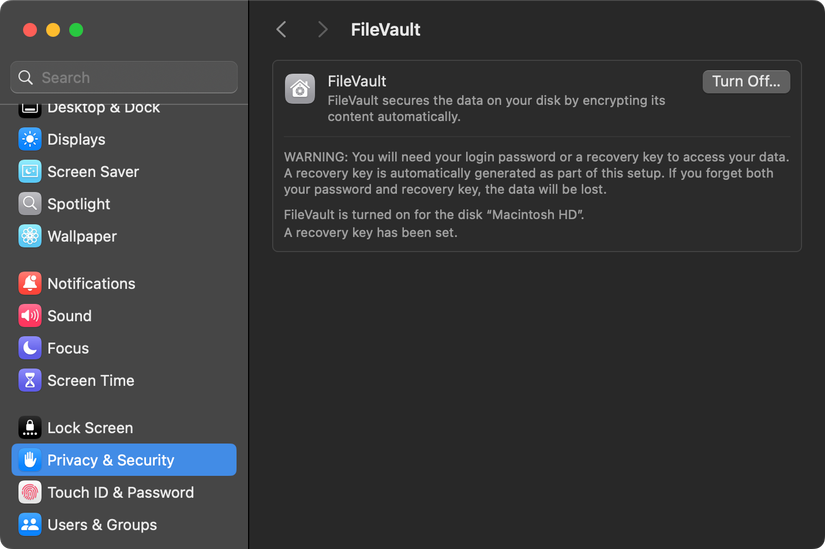
FileVault adds another layer of protection by requiring that your login password be entered before this decryption can take place. It’s one more step you can take to secure your data, and it costs nothing to do. By default, FileVault is not enabled, but you can change this under Settings > Privacy & Security > FileVault (at the bottom of the menu).
When you enable this setting, decryption will be tied to your login password. You’ll also be given a recovery key, which you should store in a secure location just in case you ever forget your password.
Warning: You should be aware that if you somehow forget your password and lose access to the recovery key, you won’t be able to access the data on your drive.
2
Encrypt Your Time Machine Backups
Time Machine is Apple’s handy set-and-forget backup solution. While there are other solutions you can use, it makes sense for most Mac owners to stick with Time Machine. Creating backups is relatively painless, and restoring them is simple since Time Machine integrates neatly into Apple’s operating system.
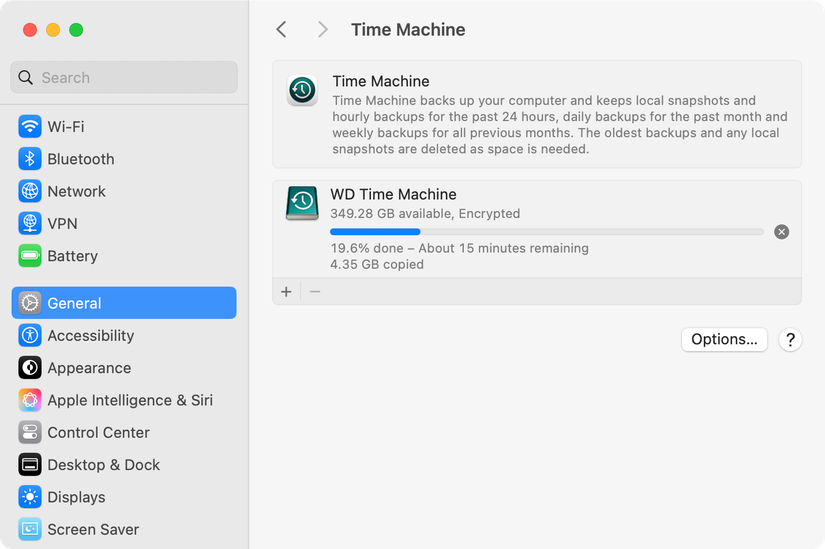
This works by connecting an external drive to your Mac, like a hard drive or solid state drive, and setting up Time Machine under Settings > General > Time Machine. By default, your backups will not be encrypted; you’ll need to enable encryption to ensure that your data is secured. Without enabling encryption, anyone who gets their hands on the drive could get access to the data therein.
If you’ve already used a drive to create an unencrypted Time Machine backup, you’ll need to set it up again to use encryption. You can format the drive using Disk Utility to the APFS format, then head back to System Settings > General > Time Machine and set up Time Machine again (this time, choosing to encrypt the volume).
Be aware that if you go this route, you will be destroying your only good backup until the process is complete. A better plan might be to buy another drive (or use a spare), set up an encrypted Time Machine backup with the new drive, and then format the old drive once the backup is complete. You can have multiple Time Machine backups (just click the “+” plus button within the Time Machine menu), so this just adds another level of redundancy.
3
Install a Software Firewall
Your Mac comes with a firewall that you can enable under System Settings > Network. This only blocks incoming connections, and it can cause some problems with certain apps and services. It also does nothing to restrict outgoing connections.
This means that if you install an application that wants to transmit data somewhere, you won’t have any control over it using the built-in firewall. You’ll have no idea what remote servers an app is attempting to communicate with, nor will you be able to bar apps from talking to the broader internet.
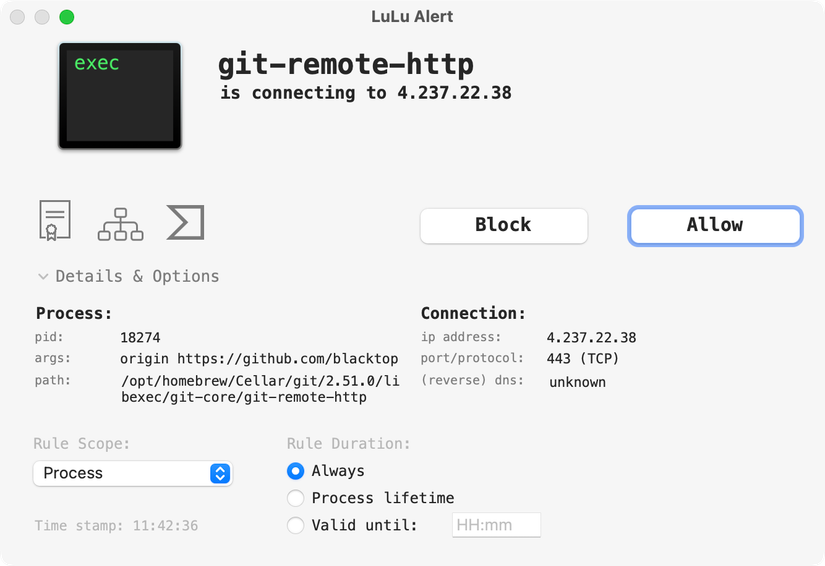
A software firewall gives you complete control over an application’s outgoing connections. Most work using an allow-list of applications and prompts that request your permission each time an app tries to communicate with a remote server.
I use LuLu by ObjectiveSee. Not only is it free and open-source, it’s lightweight and easy to use. You can choose to wave through all existing applications on your Mac, or you can audit your entire software library. You’ll see pop-ups notifying you that an application wants to access a server, the address of the server in question, and you’ll have the option to allow it temporarily or permanently.
You can also set up your own list of custom rules, which allows you to do things like block apps from talking to specific remote servers, while allowing others. When you install LuLu, you’ll be prompted to allow the installation of a network filter. The app requires this permission to act as a supervisor, so don’t panic.
4
Switch to Open-Source Software Where Possible
At How-To Geek, we love open-source software for a variety of reasons. Not only is some of the best software in the world open-source in nature, but the projects themselves are often free to use. On top of this, open-source software has some big security benefits over traditional closed-source apps.
When an app developer releases their source code, they’re essentially showing their work for the whole world to see. Anyone can comb through this code to audit it, discover problems, suggest fixes, and make sure the app is doing what the developer claims. You can think of it as a declaration that the app developer has nothing to hide, essentially amounting to security through transparency.
One example where this could be considered important is apps that are designed to tidy up your Mac’s menu bar at the top of the screen. In order to function, you must grant permission for these apps to view the contents of your screen (just as you would a screen recording app).
This is why I use the minimalist open-source app Ice for this purpose. Granting an app permission to view the contents of my screen is not something I take lightly, but I have greater faith in an app for which the source code is plainly visible.
5
Audit Your Mac’s Permissions
Apple’s robust permissions system gives you control over what installed software can access. This includes personally identifying information like your current location and Photos library, but also locations on your drive, peripherals, and much more.
You’re probably used to seeing a pop-up every time an app asks for permission to one of these things, and it can be easy just to click “Allow” without thinking too hard about the implications. That’s why it’s a good idea to audit your Mac’s permissions on a regular basis, revoking access to apps as you see fit.
Head to System Settings > Privacy & Security to see a list of permissions that you can manage. Duck into each menu and uncheck items you’re not comfortable with. Keep in mind that by doing this, you might “break” certain features within these apps, but you can always undo the change (apps are particularly good at screaming at you when you don’t give them everything they want).
There are a few areas you’ll want to pay particularly close attention to, including:
- Location Services — your literal physical location on this planet.
- Full Disk Access — these apps can access every location on your drive, whether they need to or not.
- Input Monitoring — these apps can monitor your keyboard input, so they can see everything you type.
- Microphone and Camera — these apps can listen to your surroundings and see you, though you should get notice of both at the top of the screen.
- Screen & System Audio Monitoring — these apps can see everything you do on your screen, and even record it.
- Accessibility — these apps can control your Mac directly.
6
Use a VPN
A virtual private network, or VPN for short, is one of the easiest ways of adding another layer of security to your Mac. A VPN has all sorts of benefits, but the security benefits of encrypting all of your web traffic should be self-evident. This includes everything you’re doing in a web browser, plus any other apps you’re using.
With the advent of HTTPS, your web browsing activity is considered far more secure than it once was. While your internet service provider can’t necessarily spy on your browsing session, metadata gives away a lot of what you’re doing, and DNS lookups can reveal which websites you visited and when.
With a VPN that’s properly secured against DNS leaks, the only thing that your ISP can see is that you’re encrypting your internet traffic. This isn’t a silver bullet, for example if your school has a no VPN policy it could get you in trouble, but it’s a great first step to keeping your internet activity private while reaping other benefits like accessing geofenced content.
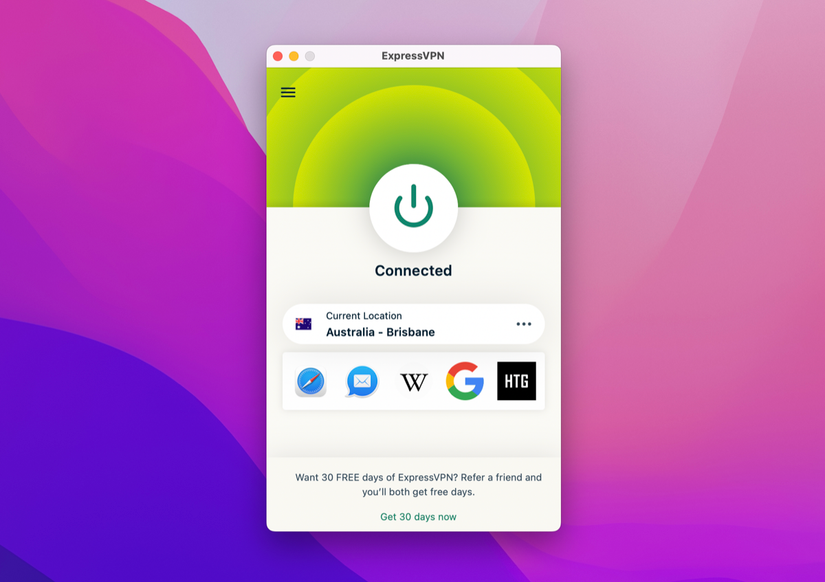
Choosing a VPN is a decision you should make carefully. We’ve got a list of VPN services we personally recommend, but you should do your own research. I’m using ExpressVPN right now, but we’ve recommended NordVPN a fair bit in the past, and services like ProtonVPN and Mullvad have solid reputations among the security-conscious.
Bonus: Change Your DNS Servers
If you’re using a VPN, you don’t need to worry about this since your DNS requests should already be hidden from plain sight. But if you’re going VPN-free for now, one simple improvement you can make is to change your DNS servers. This is the easiest way to hide which URLs you’re accessing from your internet service provider.
Choosing a DNS server is pretty easy after running a simple speed test. Once you’re done, you can change this setting under System Settings > Network by choosing your active connection (Wi-Fi or Ethernet) and then using the “Details” button to add your own DNS server.
Some of these changes take a few seconds to action, while others can take a bit more time and research. All of them will help boost your Mac’s security, so they’re all worth considering.
[ad_2]

