[ad_1]
Stepping into the world of clay bead jewelry with some kid-friendly clay bead bracelet ideas.
About two years ago, I got into clay bead bracelets, necklaces, and other jewelry making after my son brought home a bracelet he made at school.
I started looking up clay beads on Etsy and as it turns out, there’s some really cute beads out there for jewelry making. And so much variety too. You can make clay bead bracelets using only small flat beads. You can make bracelets using more tubular clay beads. And also shapes and themes of every kind. Loads of options – and great for necklaces and keychains as well.
So I thought I’d share some of my sources for clay beads and how you can make these cheerful accessories with just a couple of supplies.
Supplies
To make these clay bead bracelets, you really only need beads, something to string them onto (that is stretchy), and a pair of scissors. But there are additional supplies and tools that can be used, if desired, to make things easier.
- polymer clay beads in different shapes and/or flat round polymer clay beads*
- elastic cord or stretchy jewelry cord
- scissors
- collapsible eye needle or beading needle (optional)
- bead spinner (optional – more on that below)
*Flat round polymer clay beads are also knowns as heishi beads and polymer clay disc beads. So, if you’re not finding what you’re looking for when you search flat round polymer beads on Etsy for example, try one of those keywords.
You can also use metal crimpers and clasps and all of that. But for this tutorial, I’m keeping things basic, easy, and fast. So you won’t need any of those extra items.
Where to Buy Beads
There are truly so many places you can find clay beads. Everywhere from craft stores, like Michaels and specialty bead stores, to Amazon and Etsy. I have bought beads from all of these places and there is a pretty solid selection. Some are higher quality than others. I’ll share where I’ve had good luck finding beads…
- This set of polymer heishi beads (the flat rounds) has 15,000 pieces and comes with a huge range of colors. I have this set and have been happy with it. It also comes with clear stretchy cording, scissors, some charms, and a bunch of alphabet beads.
- Amazon does have some good quality beads. I have this animal set from there, and several others.
- There’s an Etsy shop called Your DIY Supply that has a TON of polymer clay beads in all different kinds of styles / themes. Etsy in general has tons of great polymer clay beads.
Using a Bead Spinner
To make beading easier (and much faster), you can opt for using a bead spinner. There are manual bead spinners and electric bead spinners. I have an eclectic one, so that’s the one I’ll talk about. The great thing about these electric bead spinners is they cut the amount of time it takes to make in half (if not more). So, if you have a lot of bracelets that need to made, for a birthday party or an event, this is a great little machine to have.
Basically, you attach your jewelry cording to a long needle, turn on the beading spinner and start hooking the beads from the spinner onto the needle. It’s really easy and honestly, kind of fun. The only downside to using a machine like this is that it only works for the flat round polymer clay beads. It cannot be used on thicker beads that are shaped.
How to Make Clay Bead Bracelets
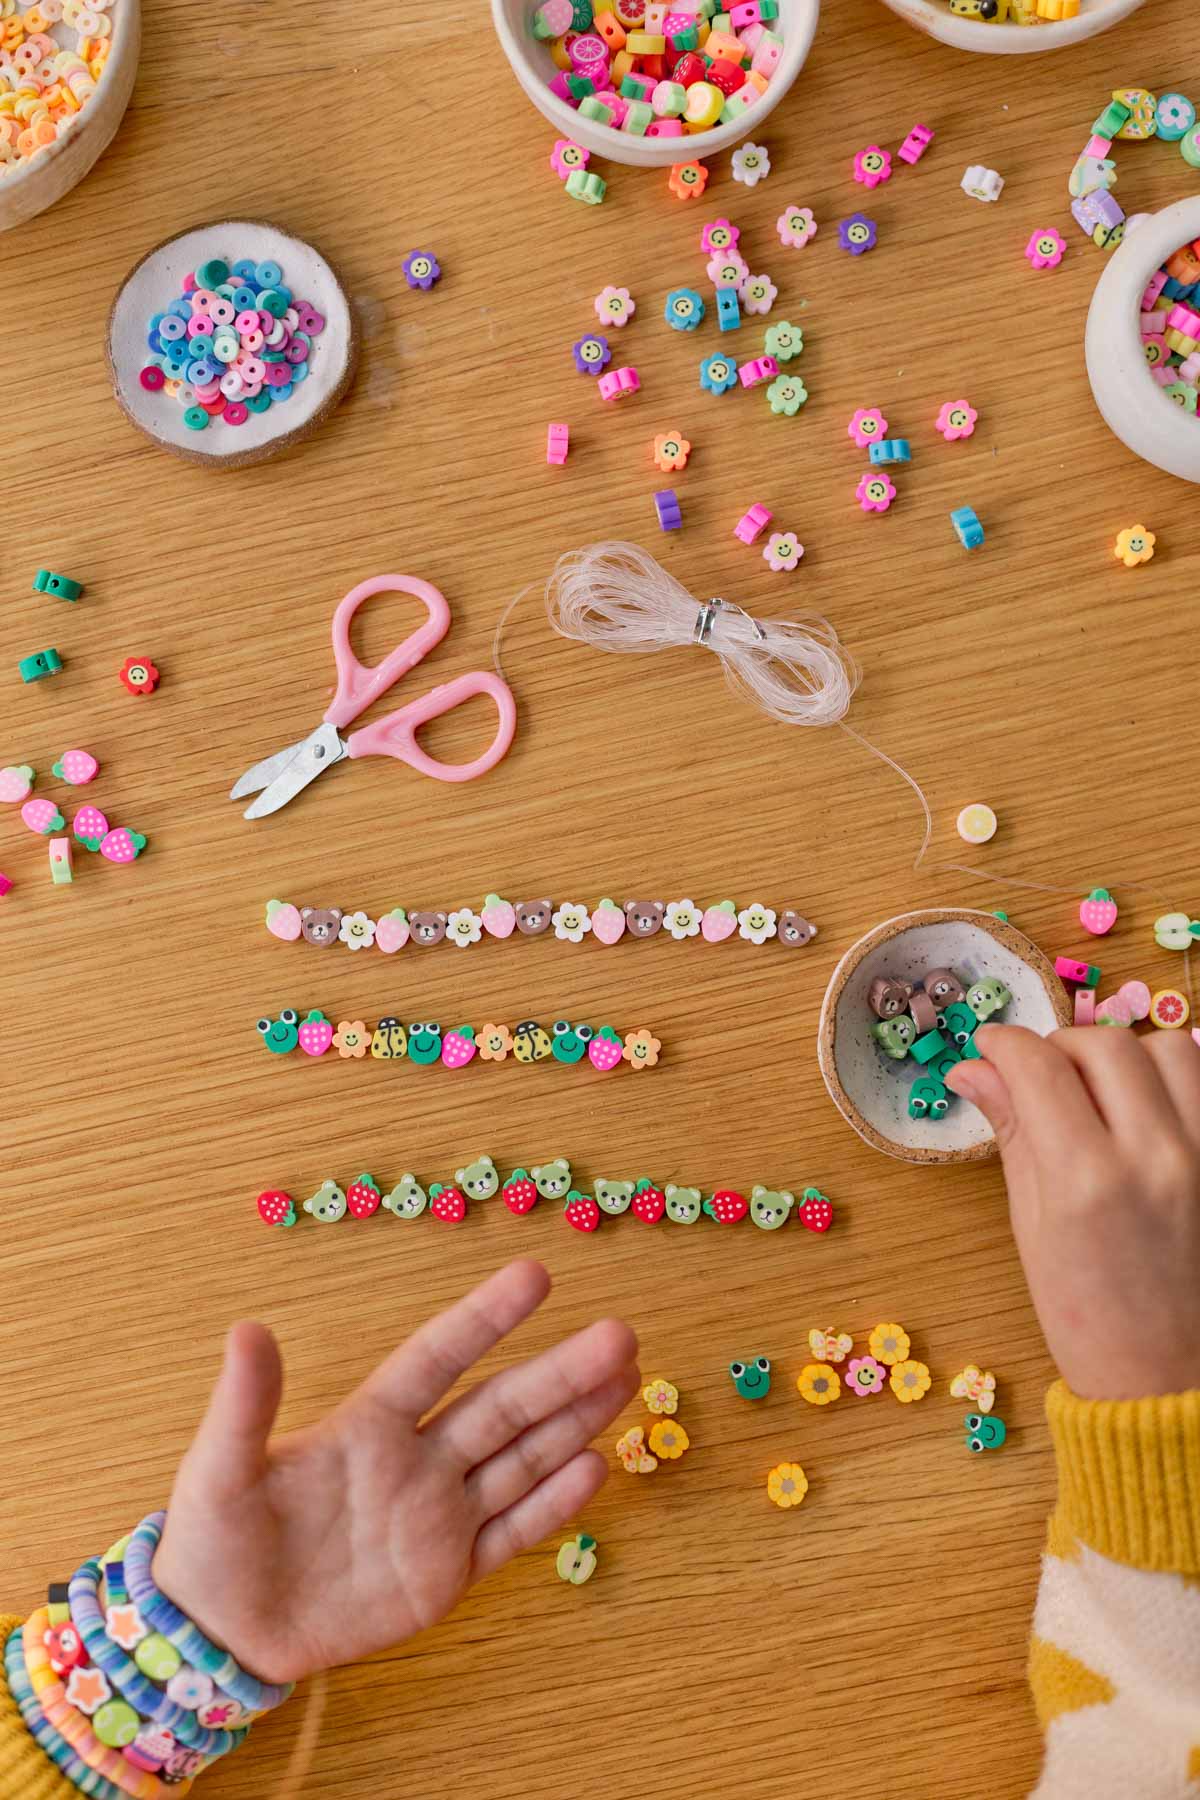
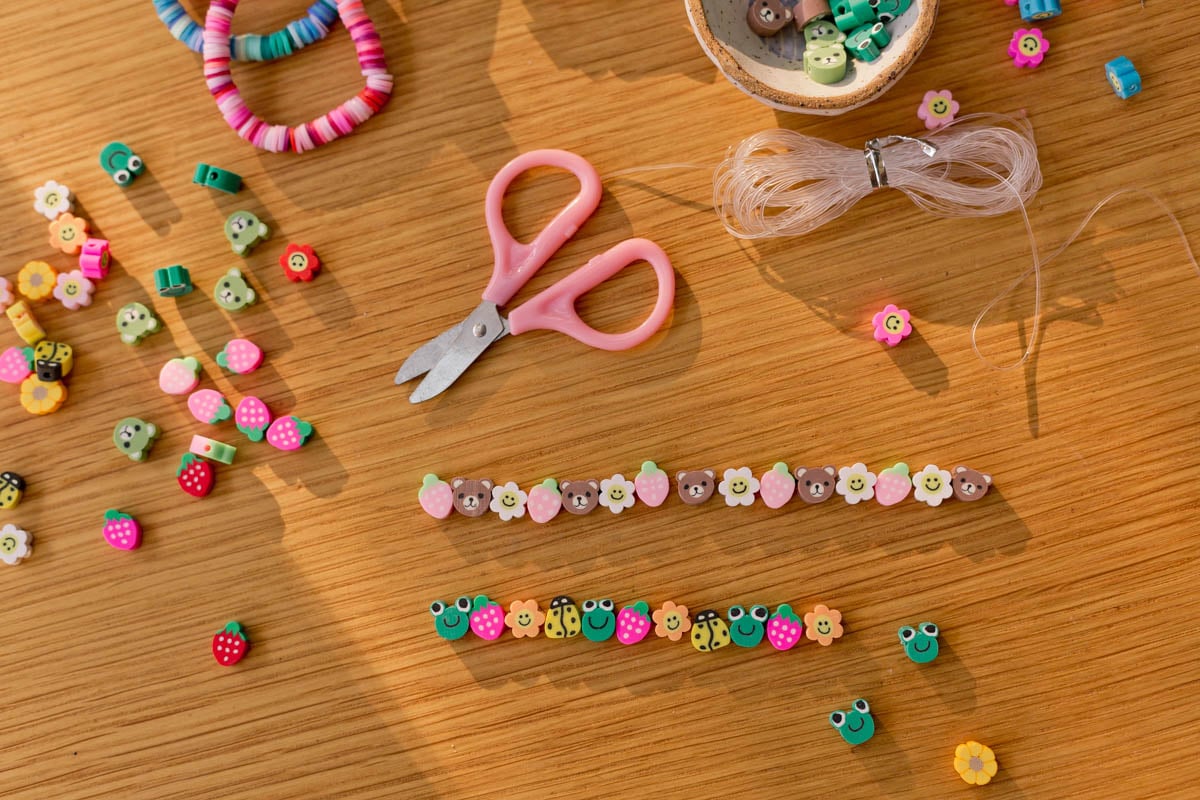
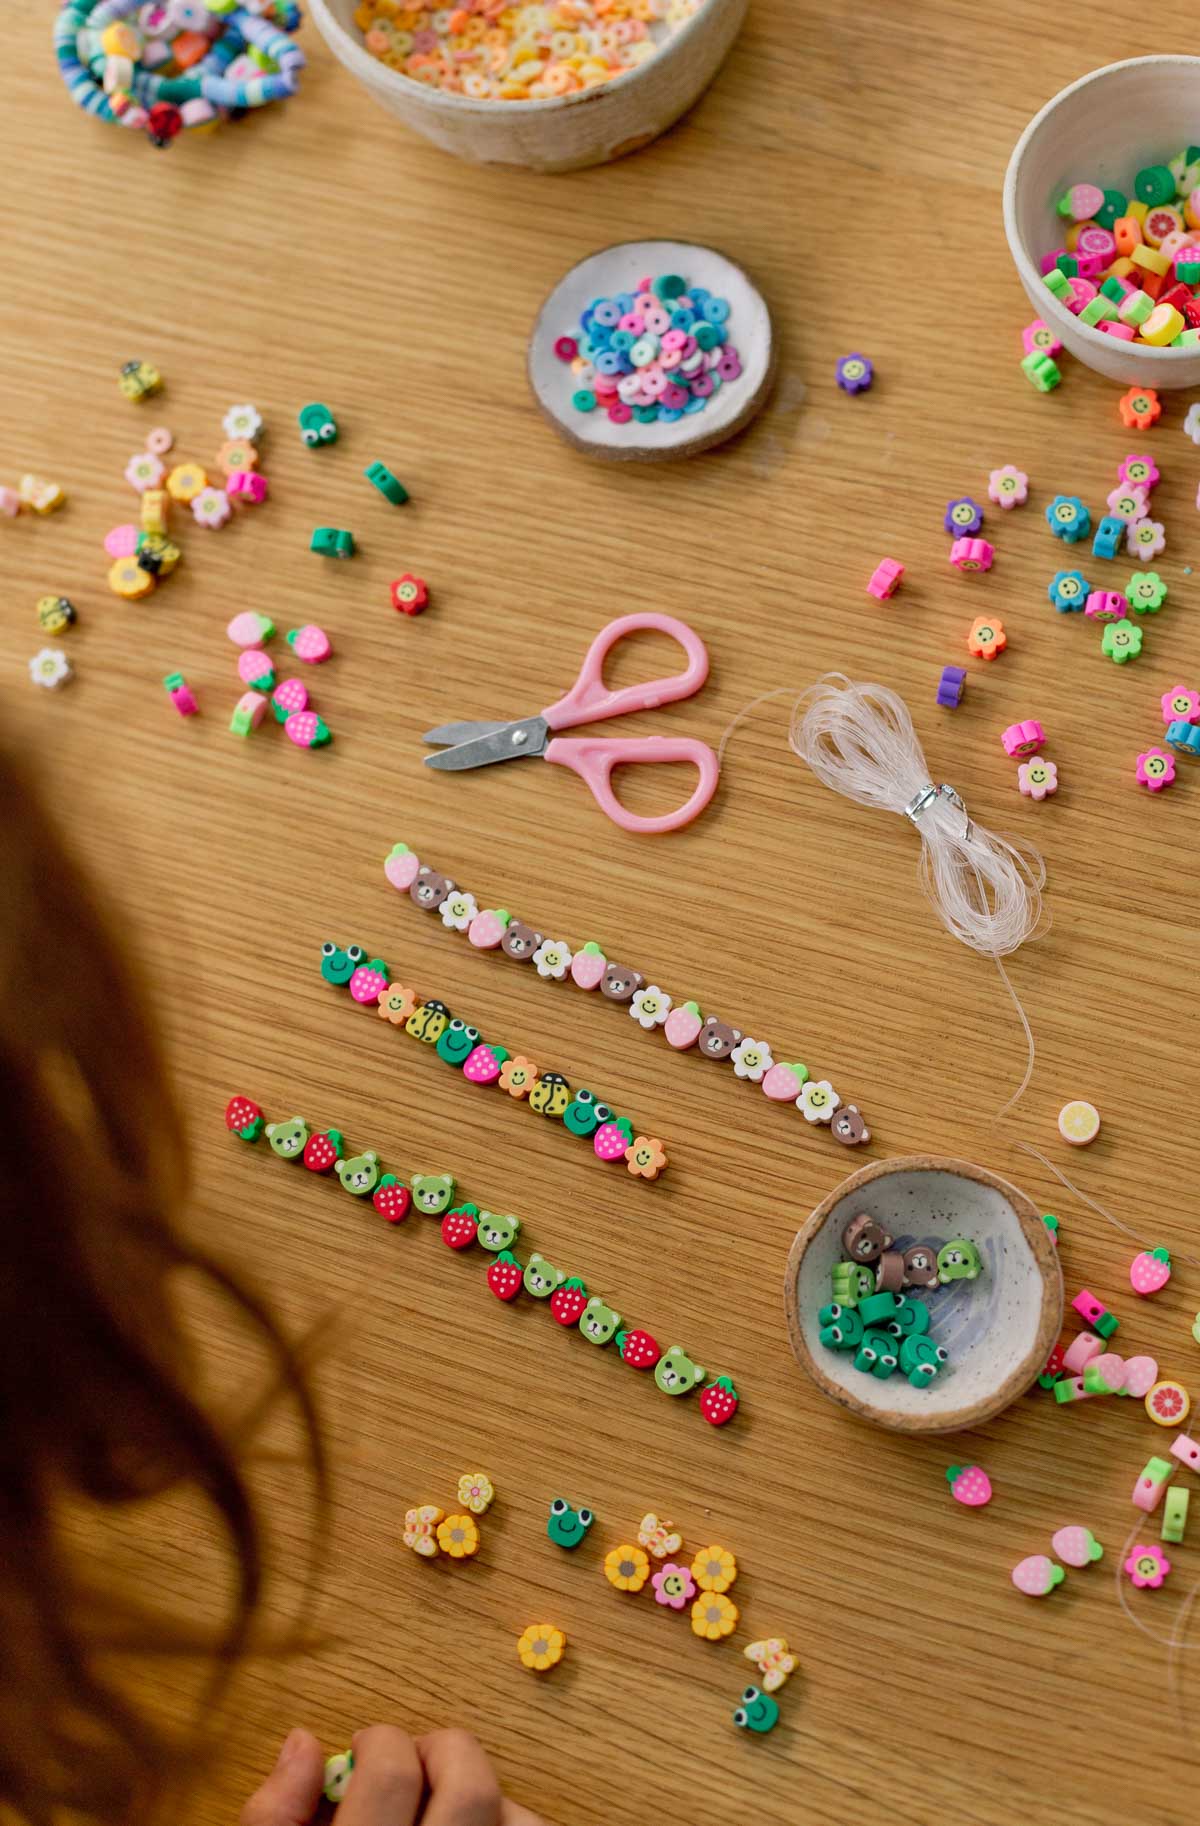
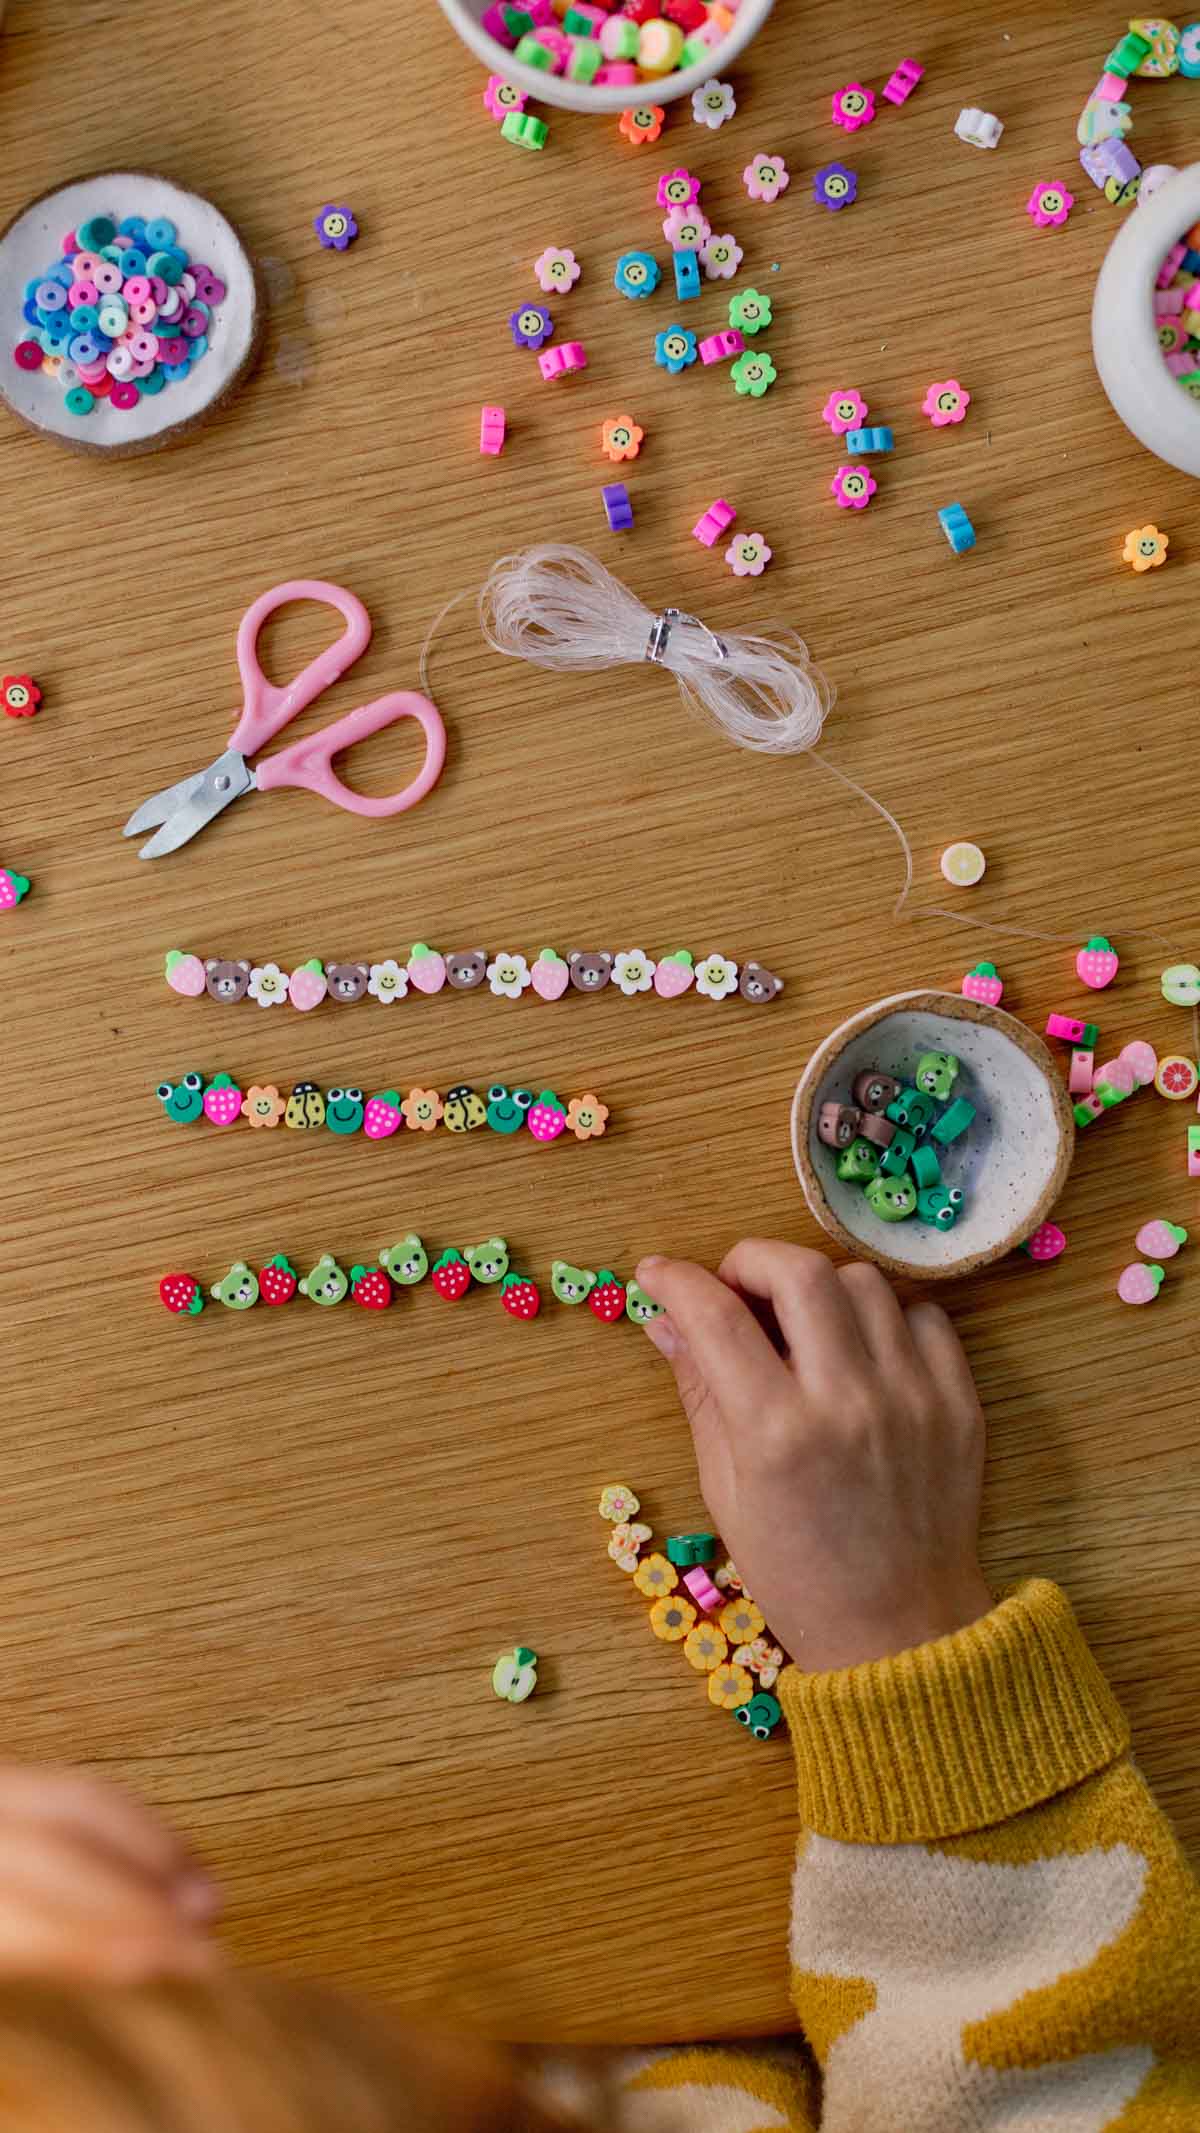
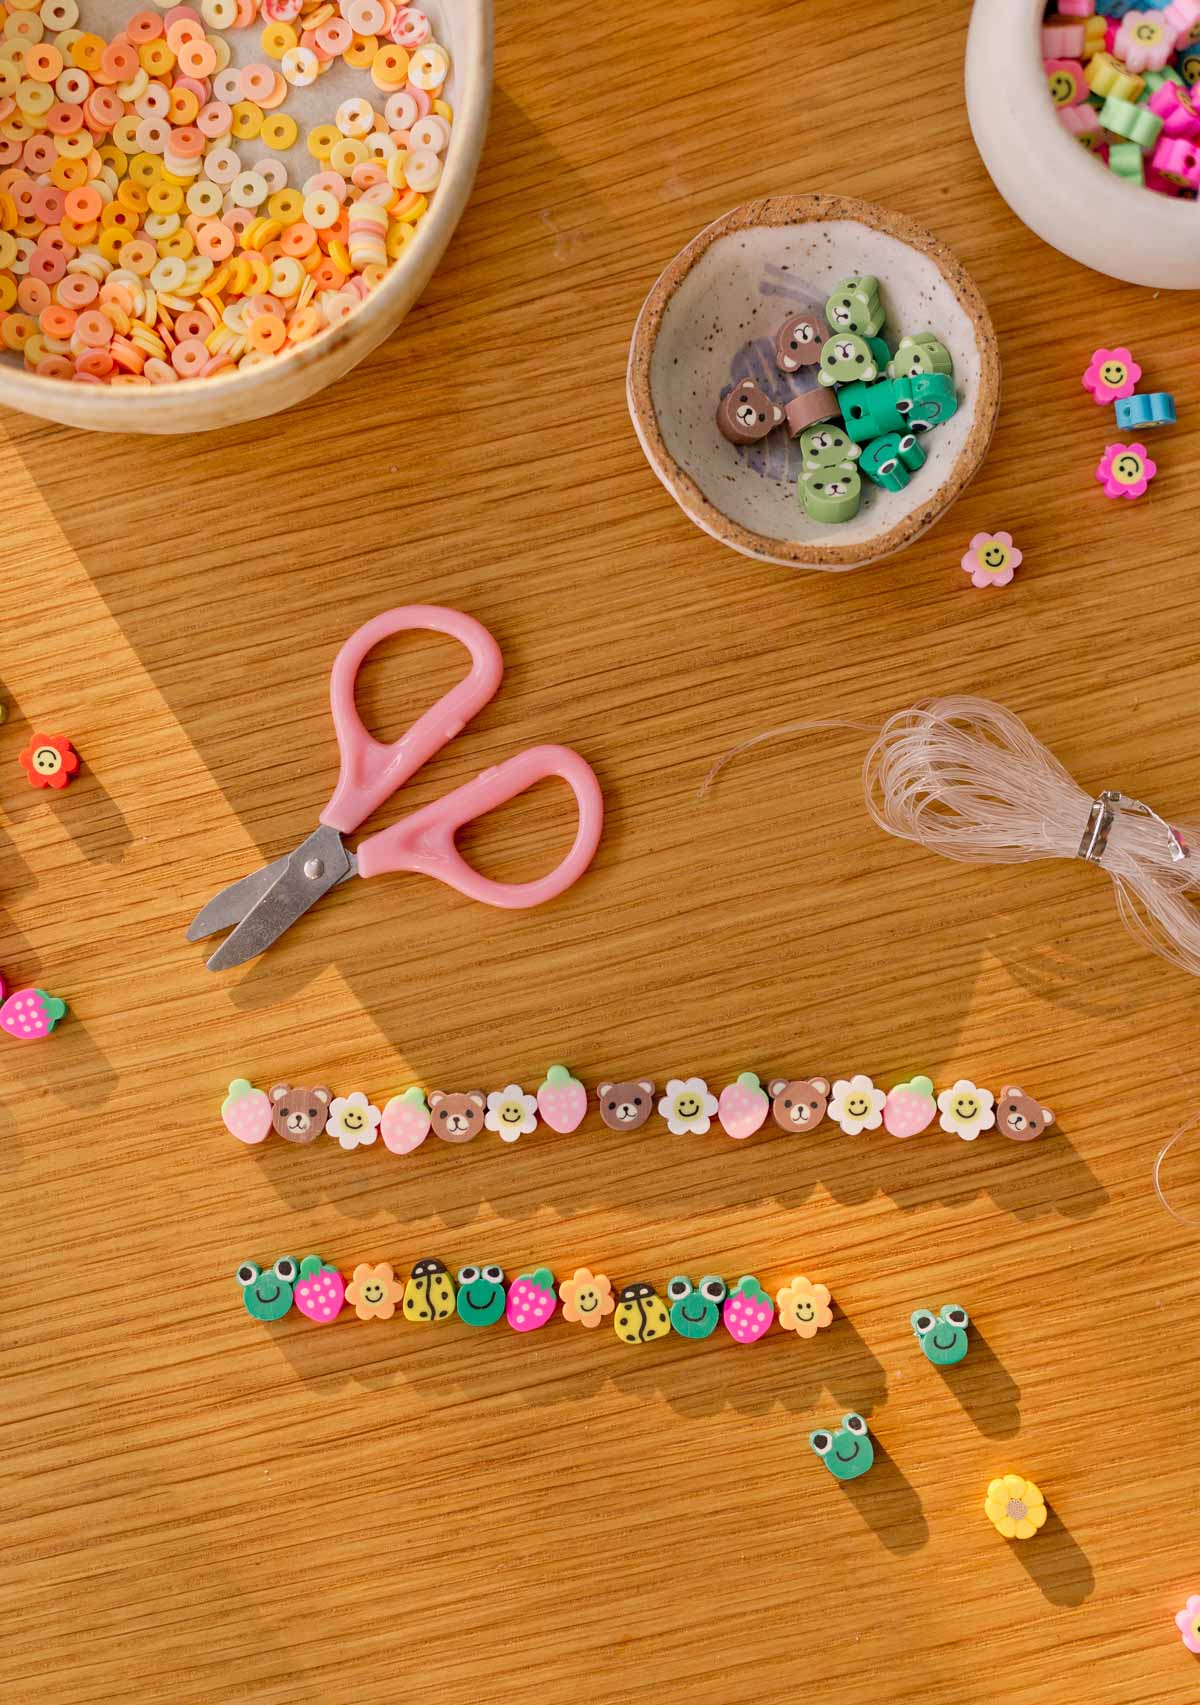
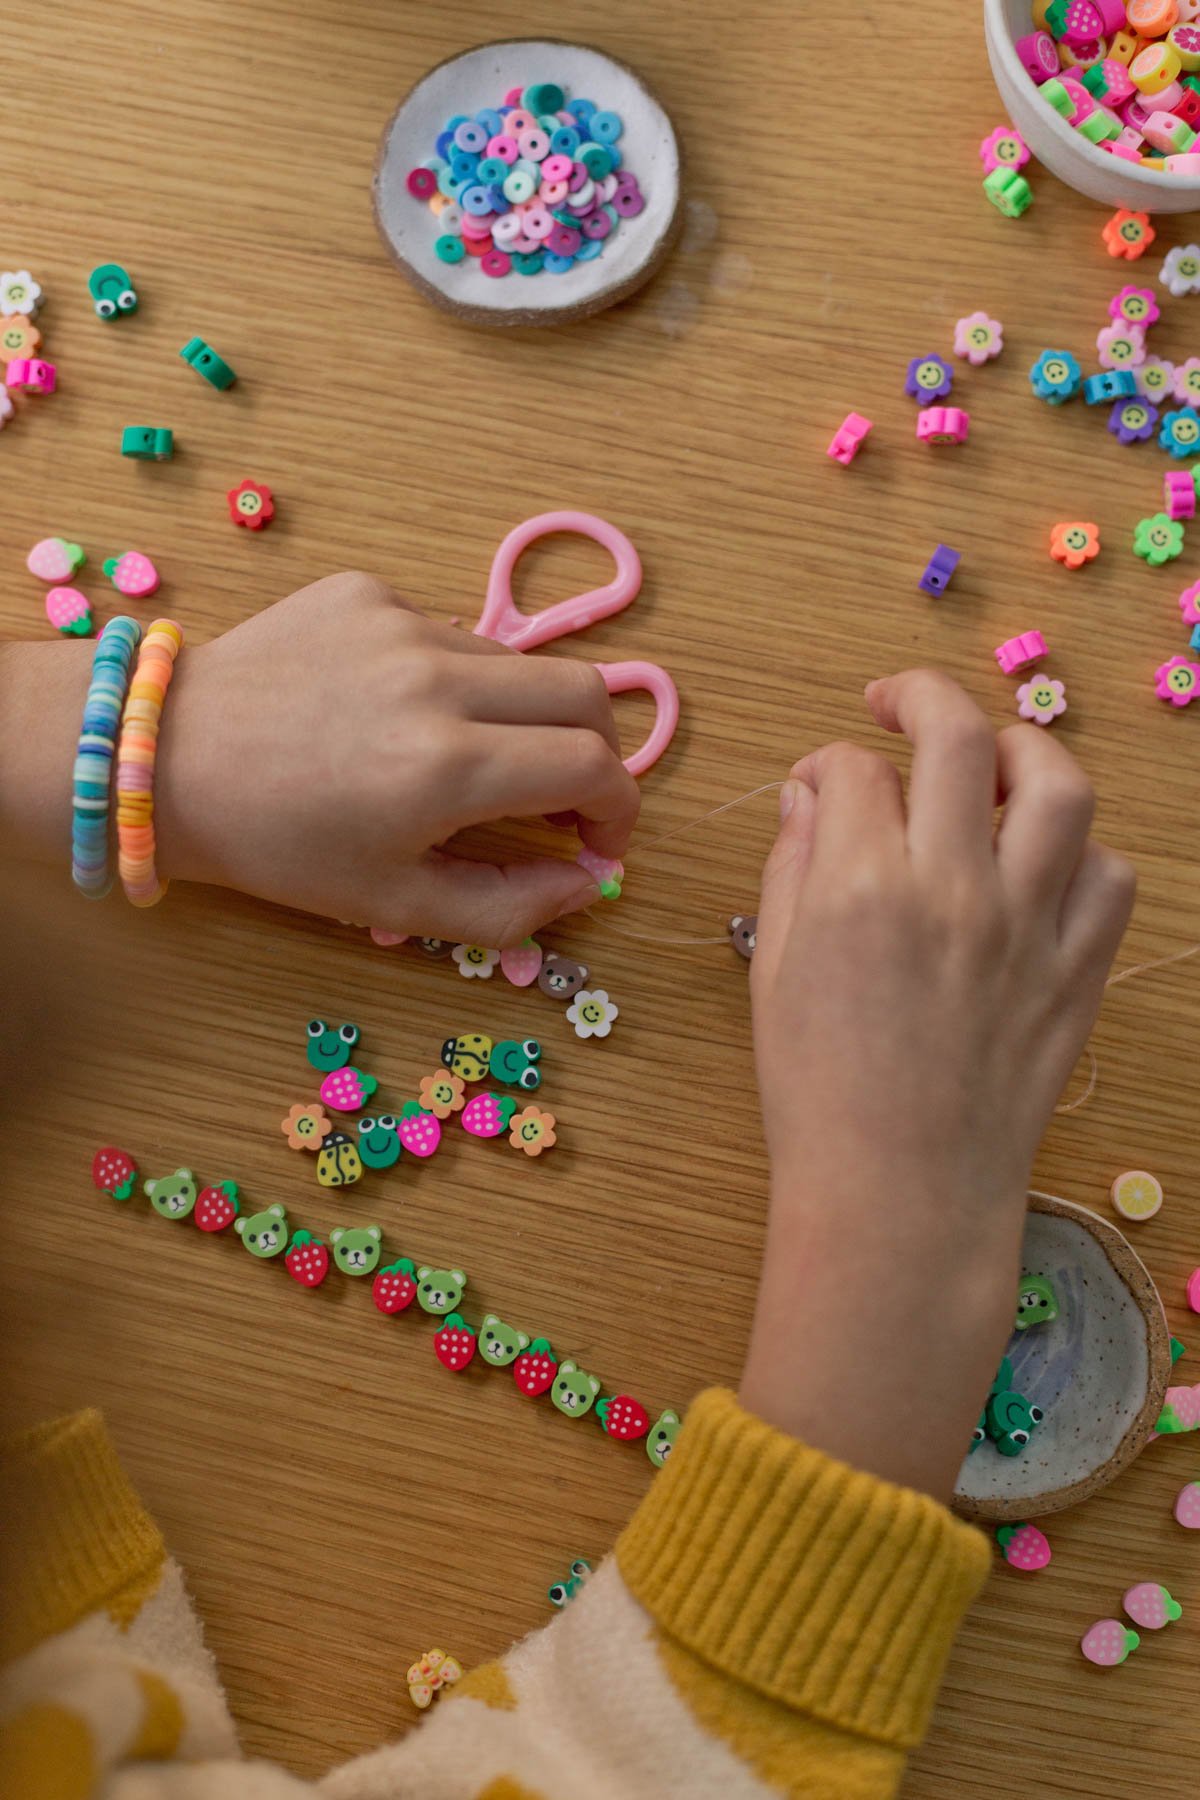
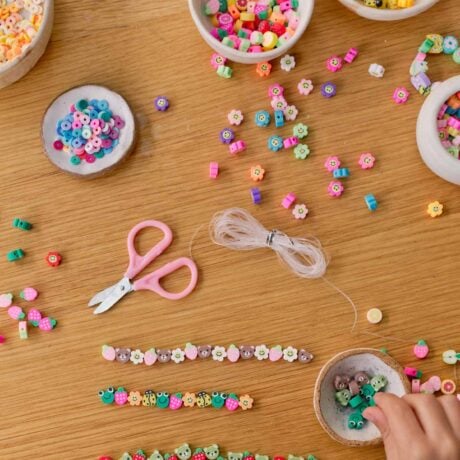
1. Measure and lay out the design.
Lay out your design and determine the number of beads needed for the proper length. I find it easier to quickly lay out the beads on a flat surface first, in the order I think I’ll want them in. Then I can switch anything out that doesn’t sit well or look the way I want it to before I get started beading.
But before I come up with the design, I need to know approximately how long the finished bracelet will be. Which is as simple as knowing the wrist size of the person the bracelet is for. That will determine how many beads I need to complete the design.
2. Cut the elastic cord.
Next, cut a piece of elastic cord or stretchy jewelry cord that is about an inch longer on each side (so 2 inches total) as your finished bracelet will be. Ex: If you need the bracelet to be 7 inches long when finished, you’ll cut a piece of cord that is nine inches long.
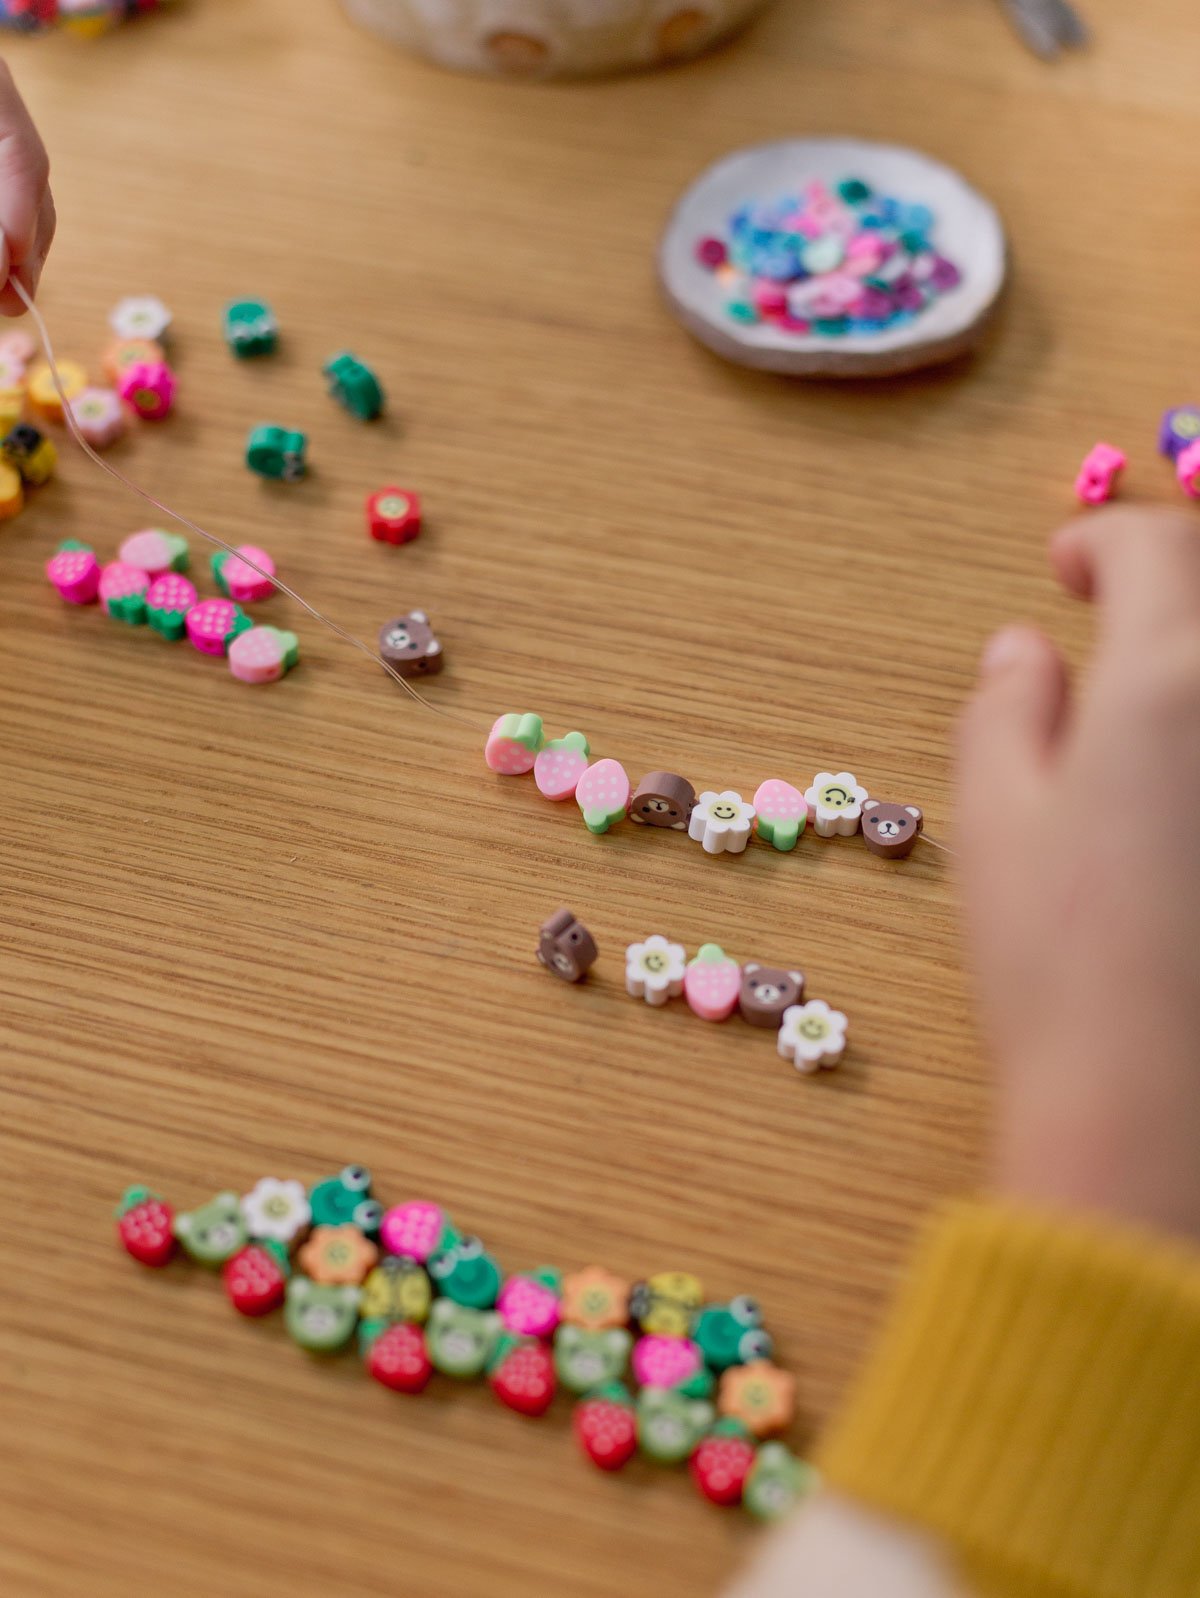
3. Then start adding beads to the cord.
If you’re using a beading needle of some kind, place the end of the cord through the eye, and you can start adding the beads onto the needle and then through to the cord, in the order of the layout you designed in step one. If you’re not using a beading needle, you can start stringing beads directly onto the cord.
And if you’re using a bead spinner, thread your needle with the cord, add your flat round beads, turn on the bead spinner, and start threading the beads onto the needle. It may take a couple of tries to get the hang of it, but once you do, it goes pretty fast. I would start at a slow or medium speed until you get the hang of it and go up from there as needed.
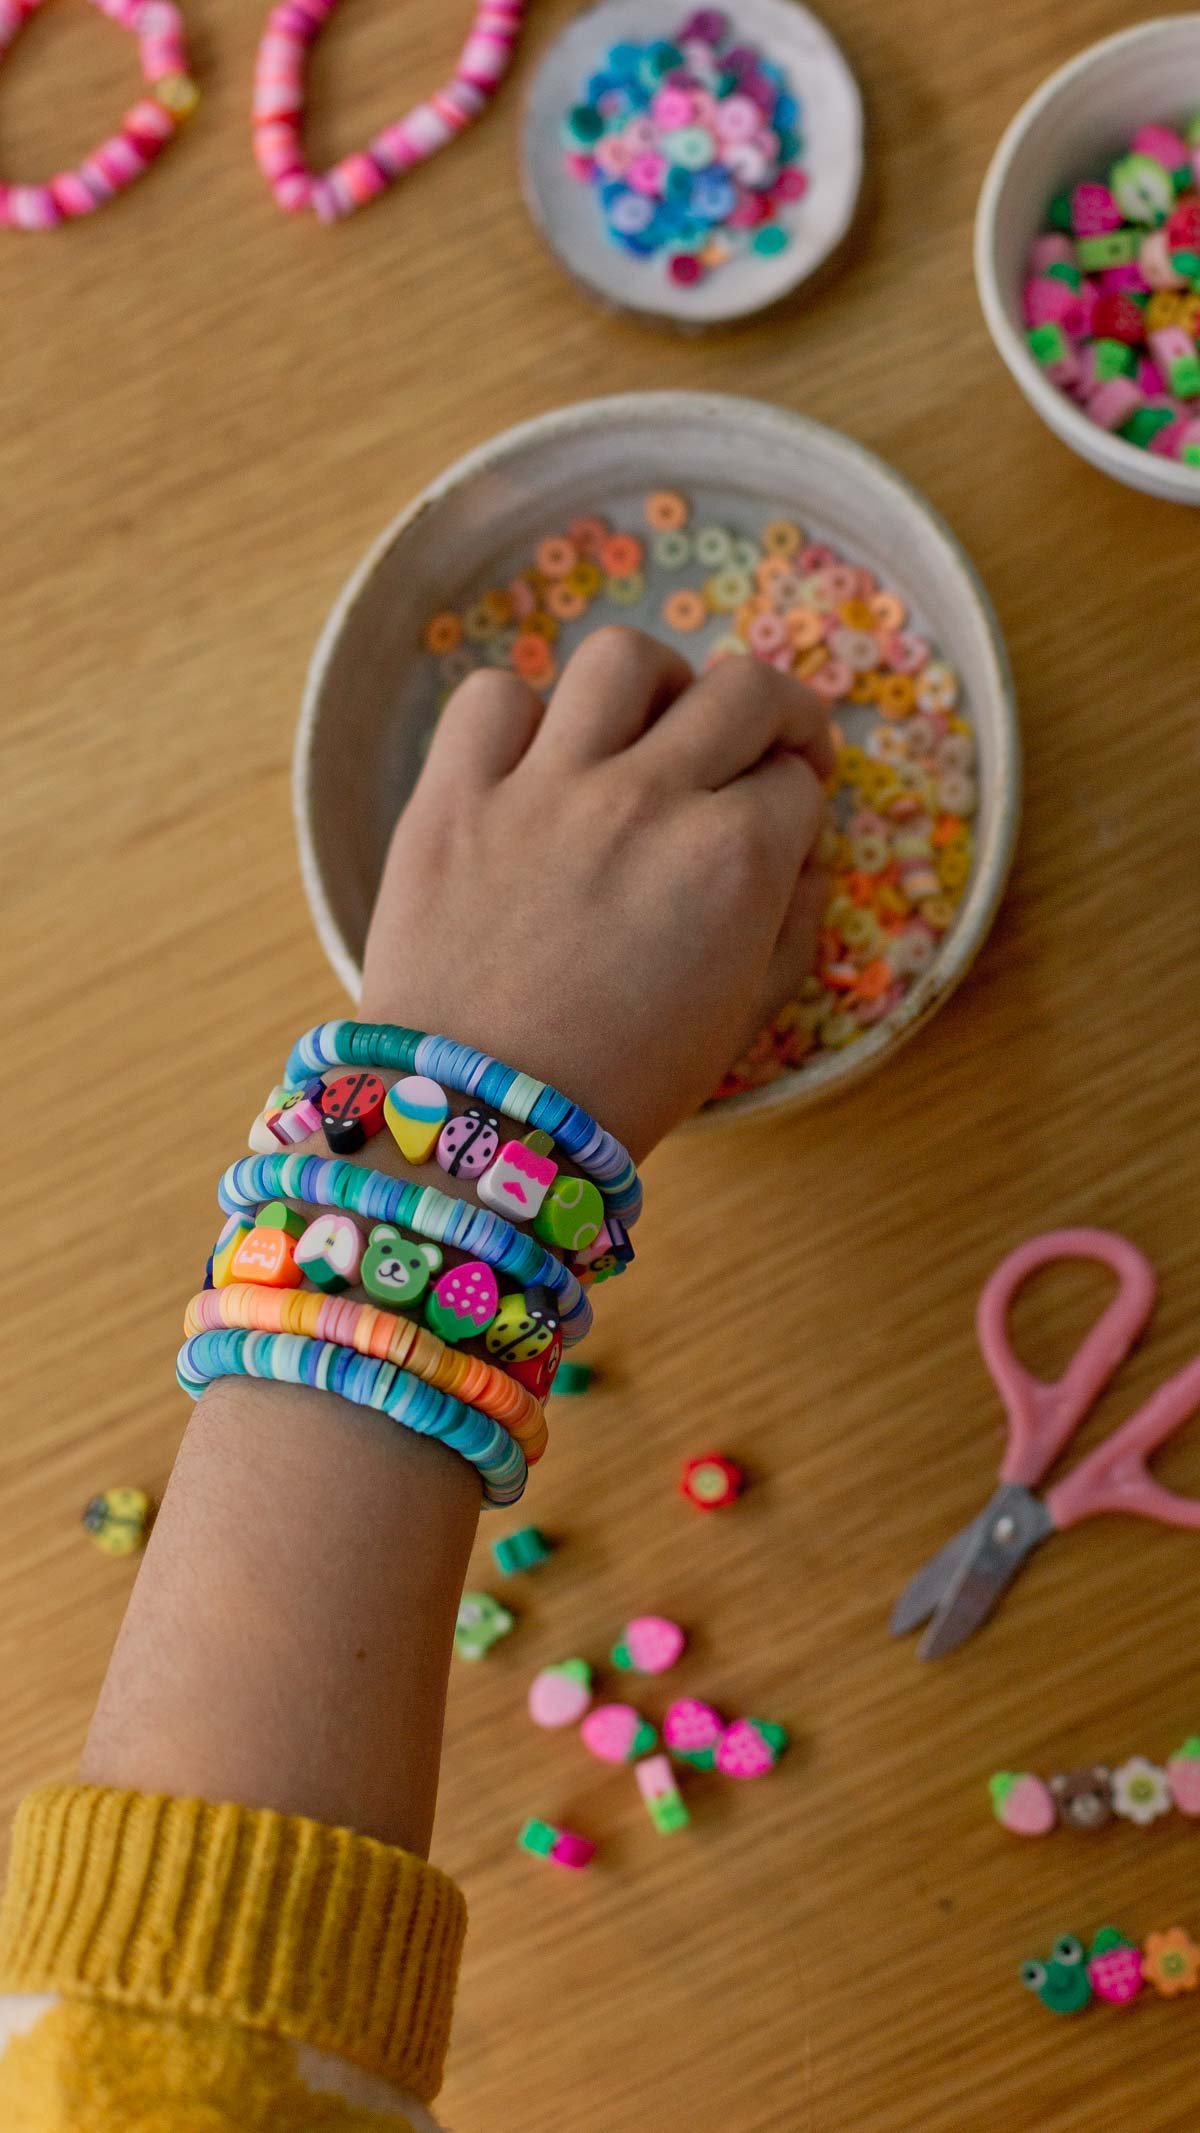
4. Tie it together and cut off excess.
Double check to make sure the completed length of the bracelet works for you. Then pulling the two loose ends together, tie them into a tight double or triple knot.
Cut off any excess string that is left after the knot. Be careful not to cut into the knot, so give a little extra space around it before cutting excess cording. OR leave the excess and just twist / move the beads around a little so they go over the knot and string and it’s ready to wear.
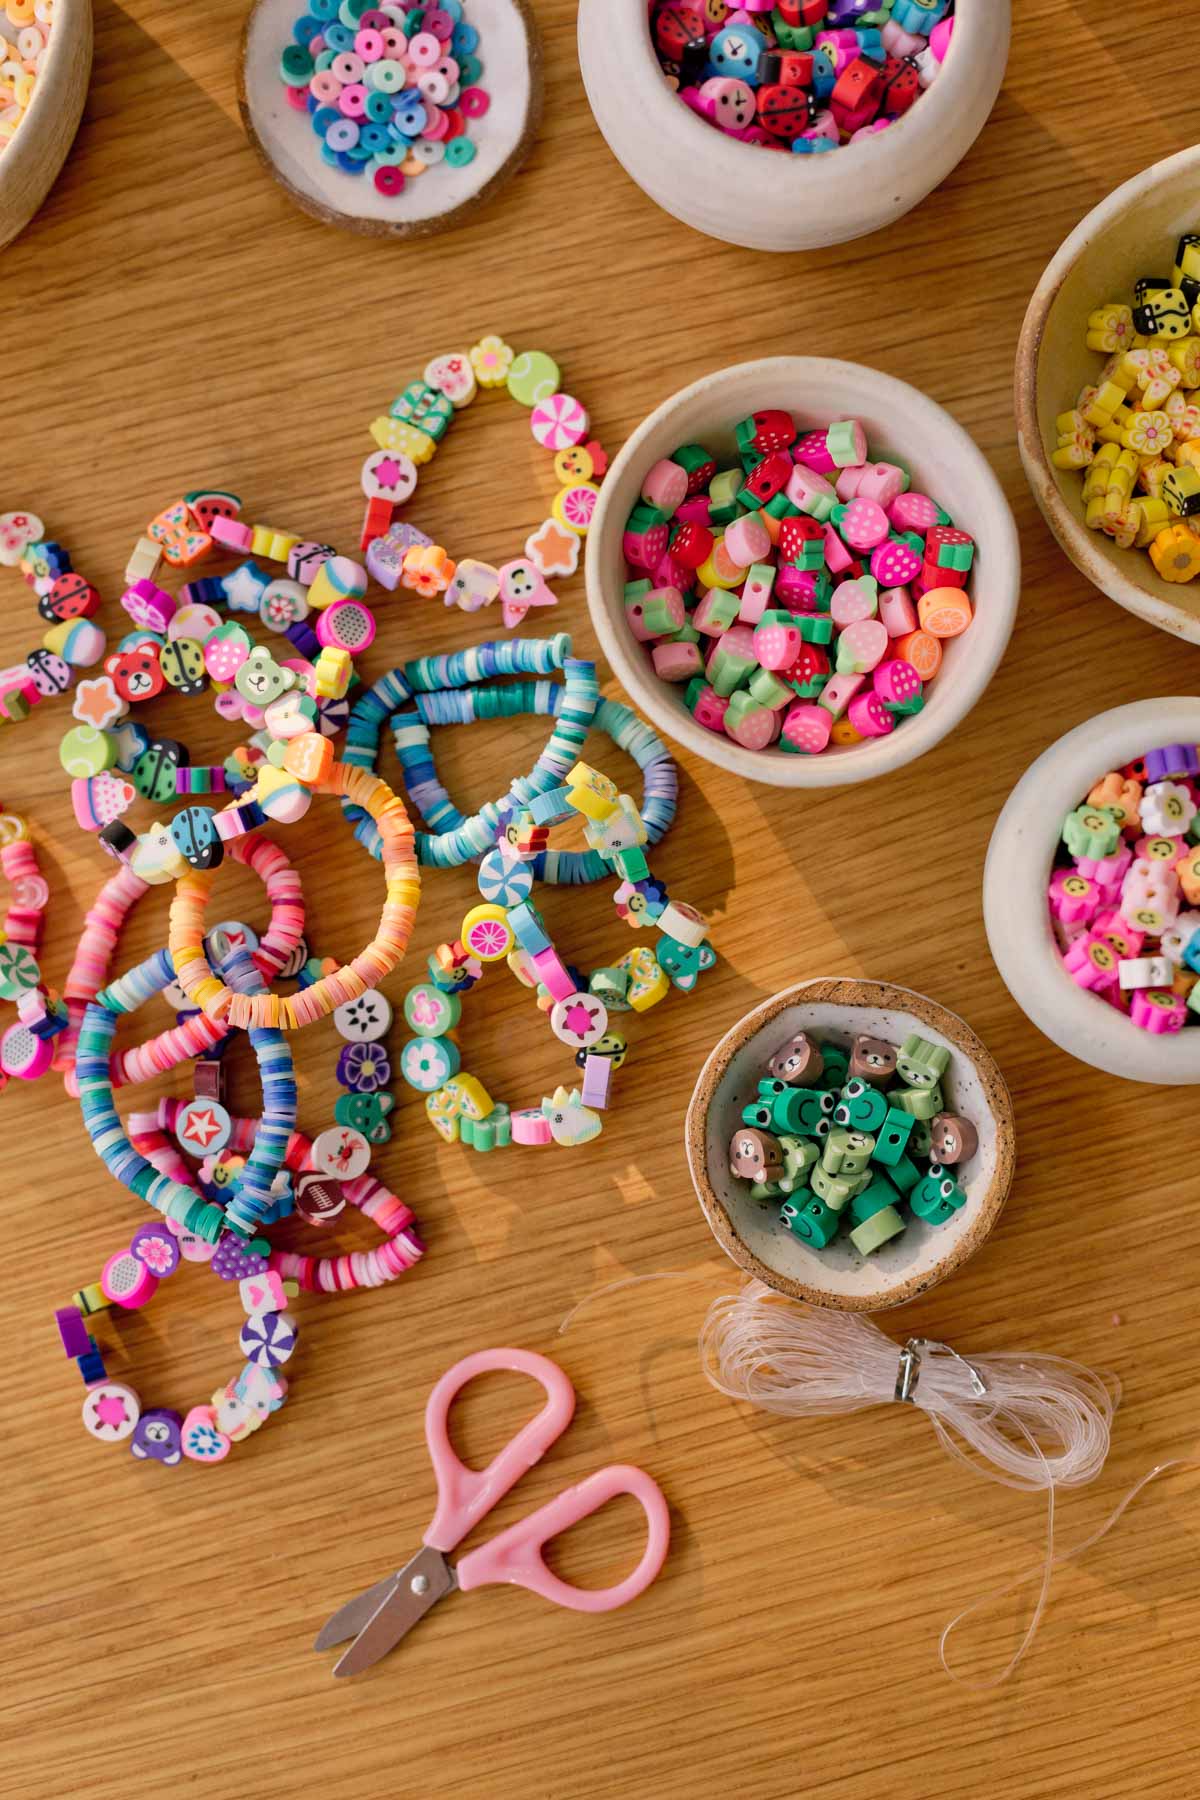
More Clay Bead Bracelet Ideas
Now that you know how to make bracelets with clay beads, here are some ideas for different kind of designs that can be made, to fit unique personalities and interests.
- Color blocked bracelets – Use flat round beads to create color blocked sections for a playful design.
- Monochromatic color schemes – Use beads that are all the same color, with various tones of one color.
- Complimentary color schemes – Color theory to the rescue with complimentary color schemes that just go together. Examples of complimentary color schemes for bracelet ideas: red and green / yellow and purple / orange and blue.
- Use letter beads to customize a bracelet with your name or something / someone you love.
- Animal lovers bracelet – Here are some animal clay beads that I’ve used, with all different kinds of animals.
- Sports lovers bracelet – There are plenty of options from team colors to sports themed beads.
- Super hero / Pokemon bracelet – Lots of Pokemon beads on Etsy.
- Rainbows and unicorns bracelet- Your DIY Supply had some cute rainbows.
- Life in the garden – with beads shaped like flowers, bugs, fruit, and more.
Clay Bead Bracelet Idea
About two years ago, I got into clay bead bracelets, necklaces, and other jewelry making after my son brought home a bracelet he made at school.
I started looking up clay beads on Etsy and as it turns out, there’s some really cute beads out there for jewelry making. And so much variety too. You can make clay bead bracelets using only small flat beads. You can make bracelets using more tubular clay beads. And also shapes and themes of every kind. Loads of options – and great for necklaces and keychains as well.
So I thought I’d share some of my sources for clay beads and how you can make these cheerful accessories with just a couple of supplies.
- polymer clay beads in different shapes and/or flat round polymer clay beads*
- elastic cord or stretchy jewelry cord
Measure and lay out design.
-
Layout your design and determine the number of beads needed for the proper length. I find it easier to quickly lay out the beads on a flat surface first, in the order I think I’ll want them in. Then I can switch anything out that doesn’t sit well or look the way I want it to before I get started beading. But before I come up with the design, I need to know approximately how long I need the finished bracelet to be. Which is as simple as knowing the wrist size of the person the bracelet is for. That will determine how many beads I need to complete the design.
Cut elastic cord.
-
Next, cut a piece of elastic cord or stretchy jewelry cord that is about an inch longer on each side (so 2 inches total) as your finished bracelet will be. Ex: If you need the bracelet to be 7 inches long when finished, you’ll cut a piece of cord that is nine inches long.
Then start adding beads to the cord.
-
If you’re using a beading needle of some kind, place the end of the cord through the eye, and you can start adding the beads onto the needle and then through to the cord, in the order of the layout you designed in step one. If you’re not using a beading needle, you can start stringing beads directly onto the cord.
-
And if you’re using a bead spinner, thread your needle with the cord, add your flat round beads, turn on the bead spinner (I wouldn’t start at full speed), and start threading the beads onto the needle. It may take a couple of tries to get the hang of it, but once you do, it goes pretty fast.
Double check length and knot the ends together.
-
Double check to make sure the completed length of the bracelet works for you. Then pulling the two loose ends together, tie them into a tight double or triple knot. Cut off any excess string that is left after the knot. Be careful not to cut into the knot, so give a little extra space around it before cutting excess cording. OR leave the excess and just twist / move the beads around a little so they go over the knot and string and it’s ready to wear.
[ad_2]