[ad_1]
I love a good art project. Here’s one you can do at any skill level.
I’ve made plenty of DIY art over the years, but the thing I love most about this art idea is that you can not only make it any scale, you can also complete it at any skill level. Even kids can get in on the action for this one.
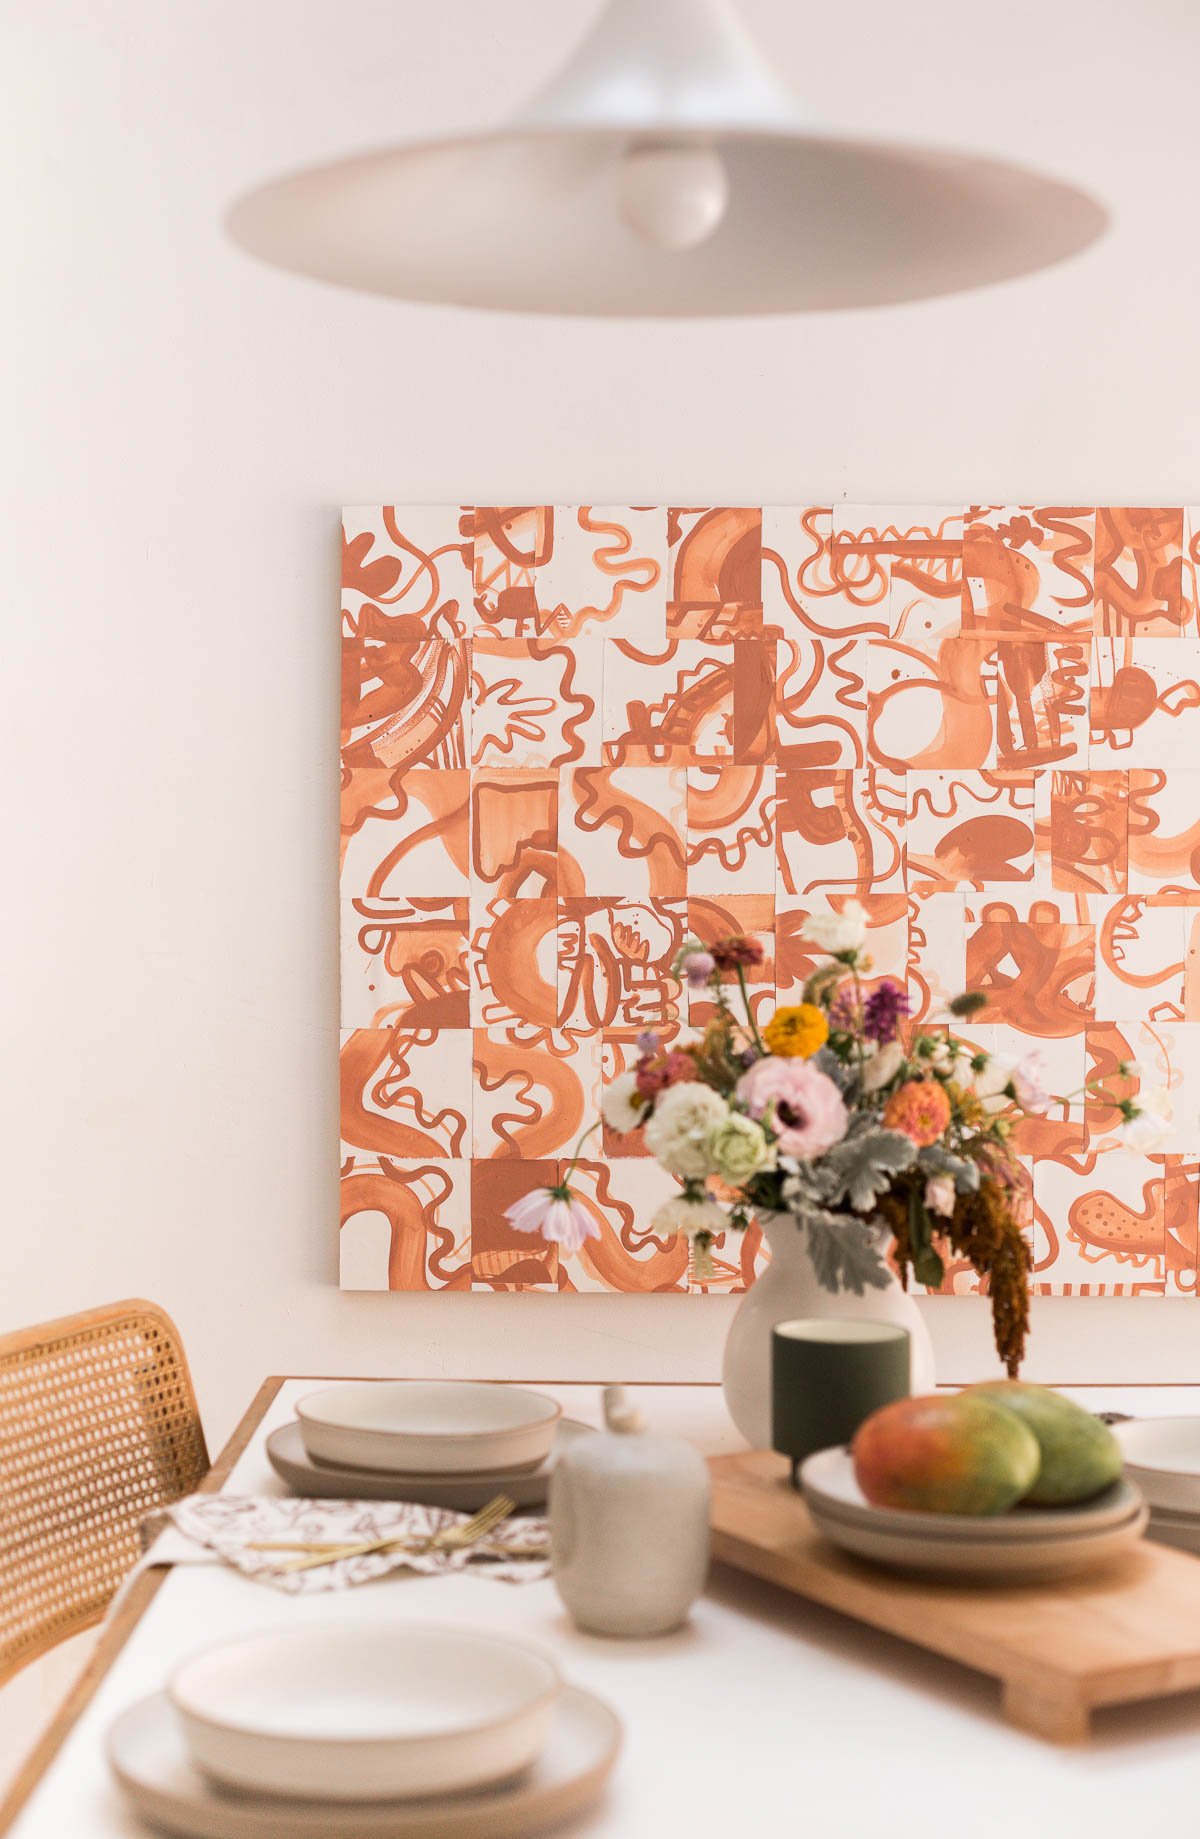
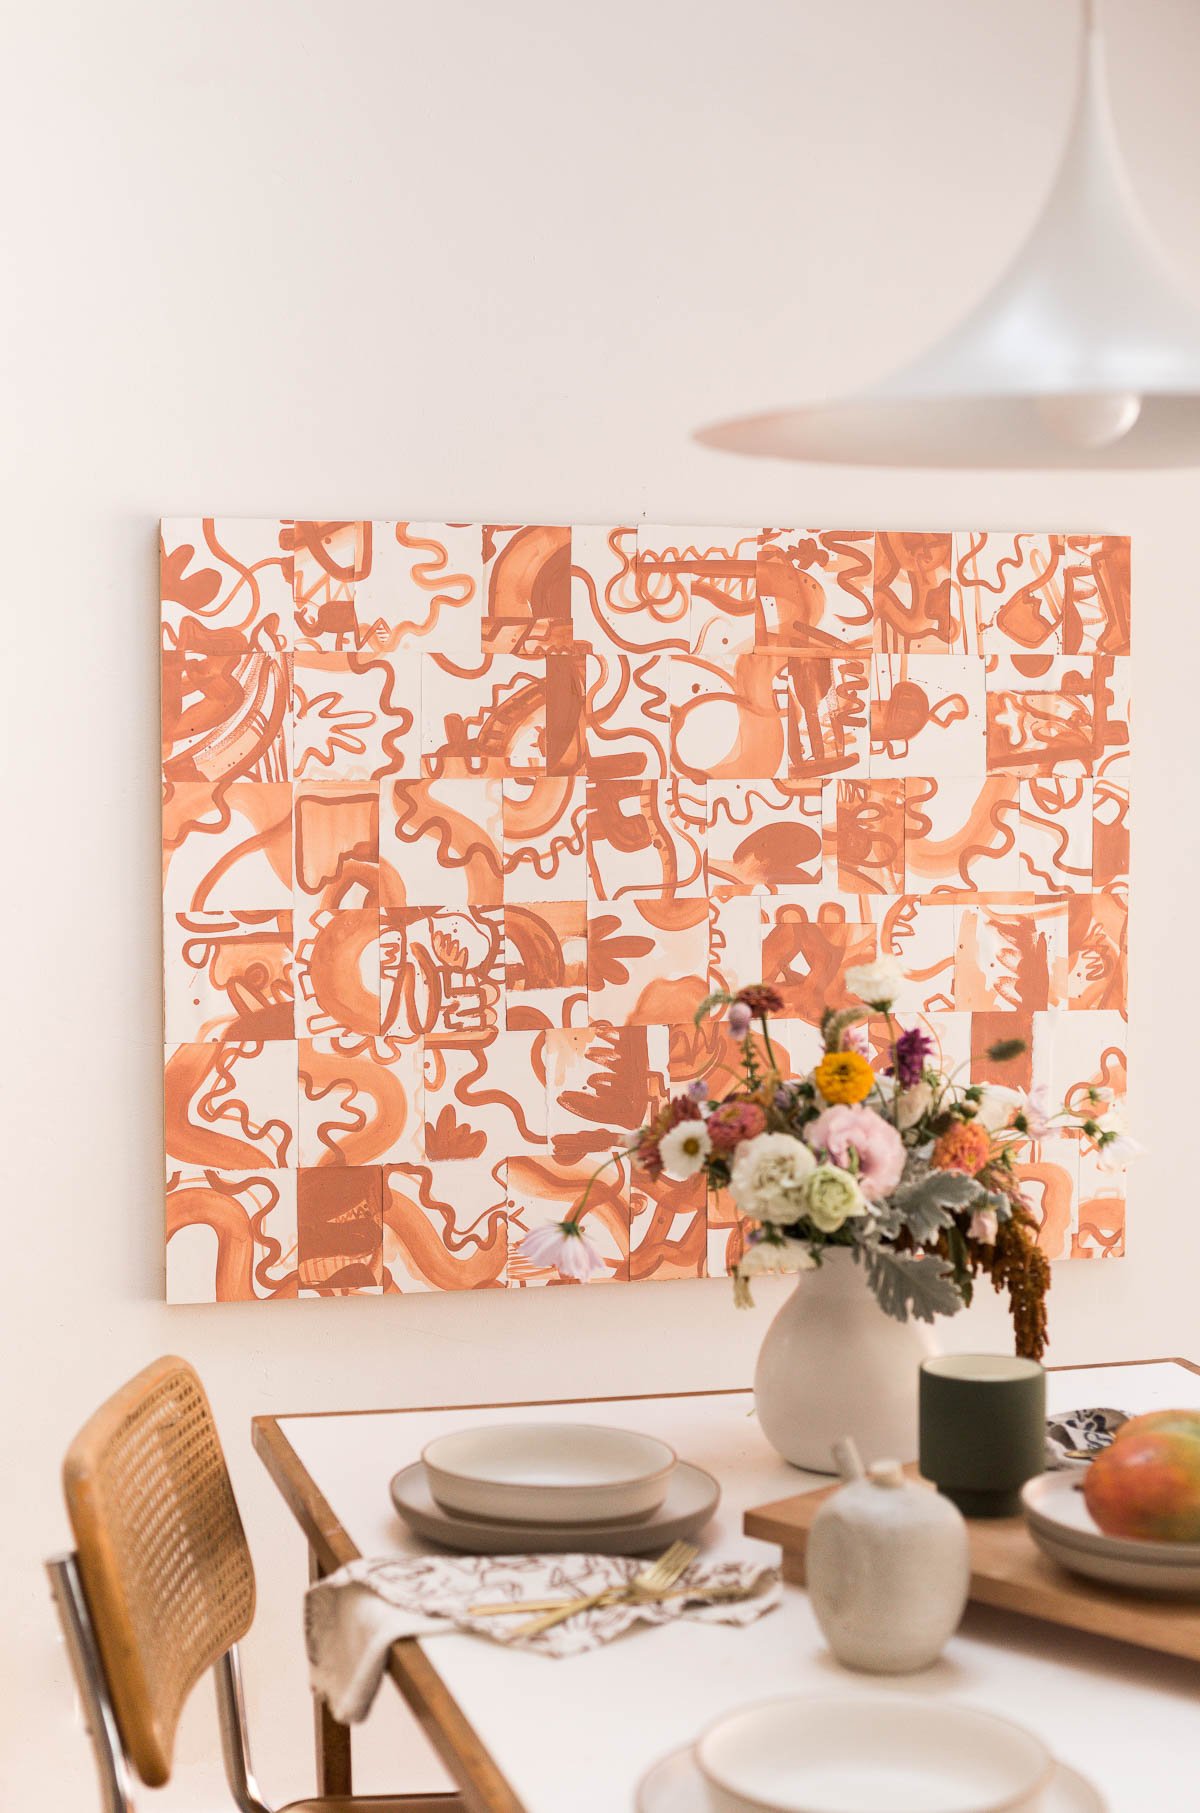
Inspired by patchwork quilts, this is how to make a large scale abstract / mixed media art piece. Click through for the tutorial.
A little backstory on this DIY…
When I was little, my grandparents only lived a block away from us. So I spent a lot of time with them when I was young. Some of my fondest memories at their house were times when I was just sitting next to my grandma while she sewed her quilts.
She was part of a local quilting club and did some quilt shows and all of that. She had a whole room stacked full of fabrics and supplies. And sometimes I would go in there and look through all the fabrics and pick out my favorites. And think about what I would make when I eventually learned how to sew.
Anyway, I remember thinking how neat it was, that she made these very time-consuming textiles just for the love of it. Not with the intention of selling them, just making things for fun as a way to pass the time.
I think about that often. And its one of the many reasons why I feel such a connection to making things.
Supplies
- paint (I used Canyon Ridge from BHG paint)
- large heavyweight art paper 22×30 or larger (I like Reeves BFK)
- cradled art panel (or canvas), lightweight masonite, or scrap wood
- matte medium or glue
- small containers (for thinning down paint, if desired)
- paint brush
- pencil
- scissors
- ruler or straight edge
- water
How to Make Large Artwork for the Wall
Quick note: You can use several different paint colors for a project like this (just make sure the colors work well together).
OR you can do what I did, and just use one paint color and create washes in varying transparencies to give some depth, without a ton of extra work.
I’ll explain the directions from that point of view, with the washes. But obvs, do whatever you like.
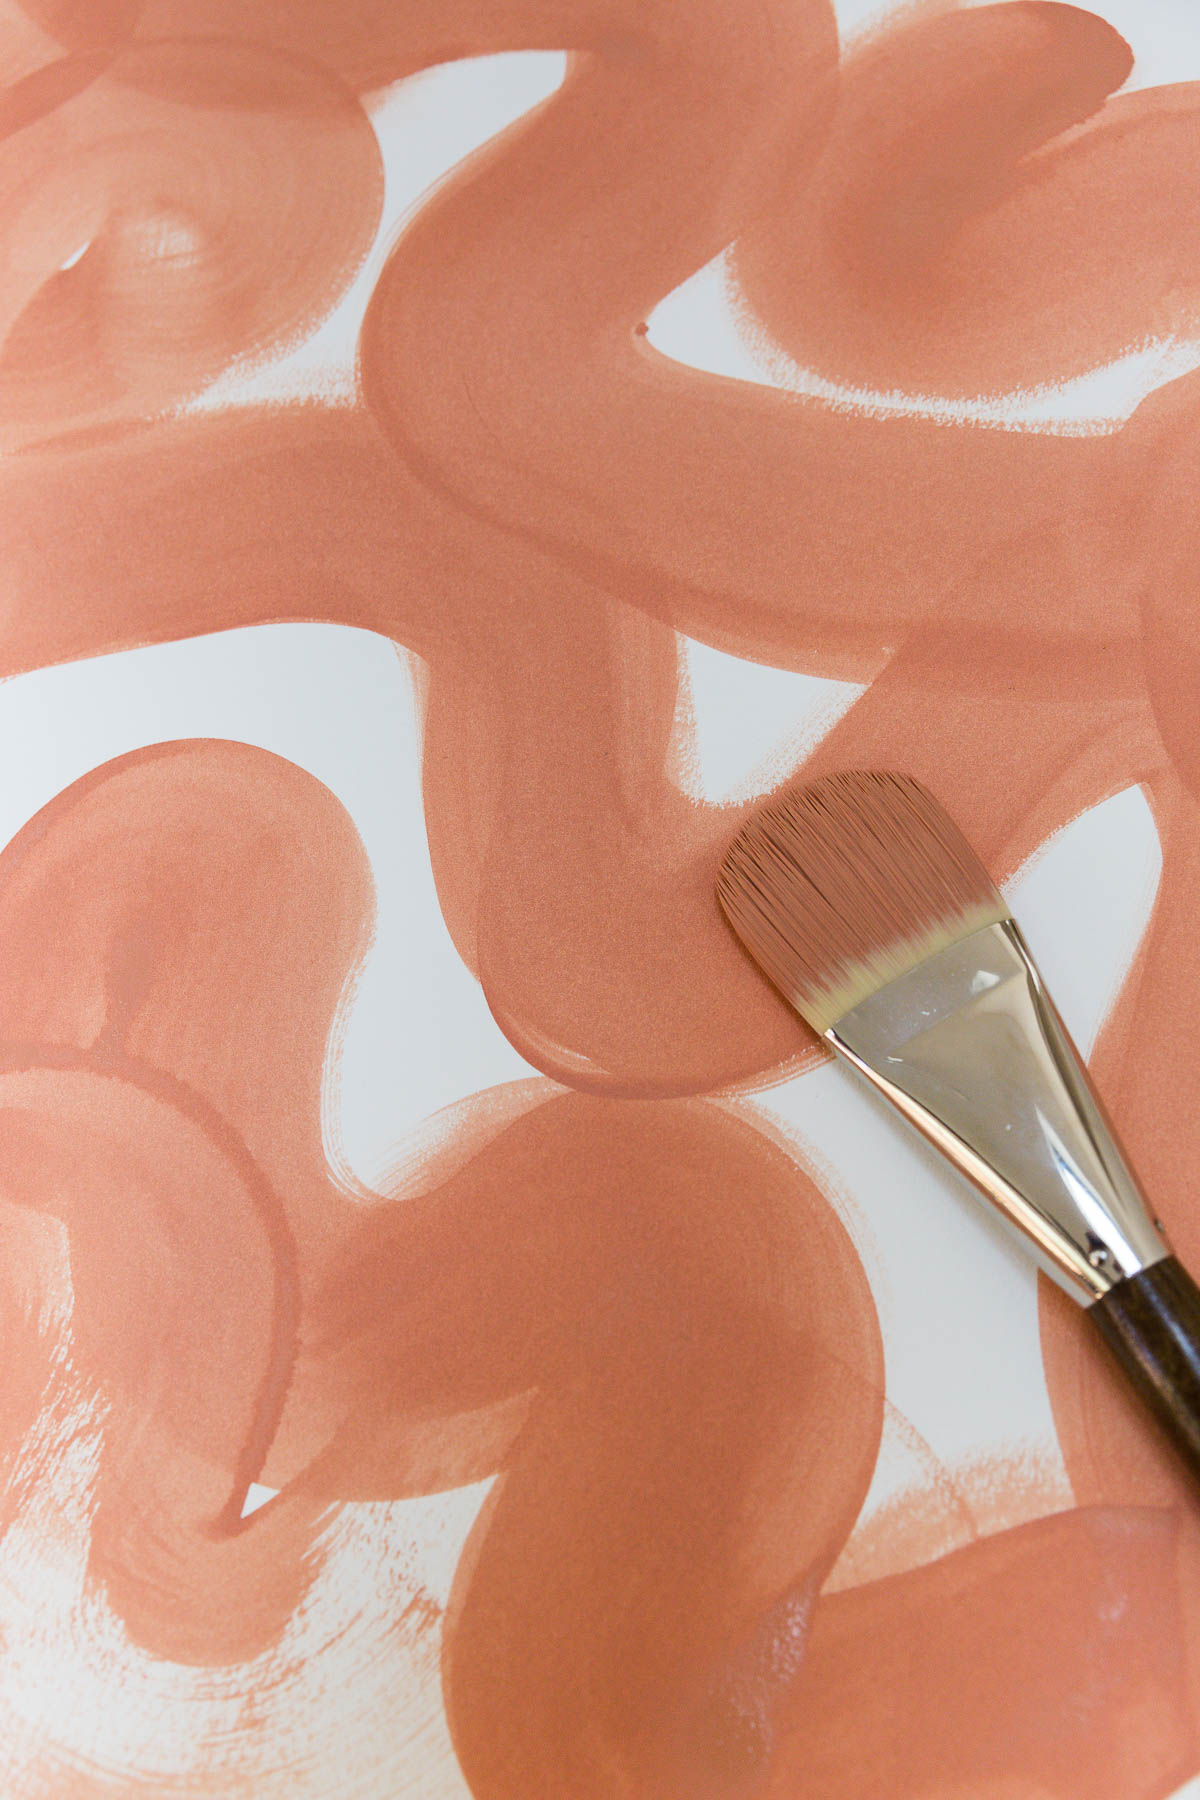
1. Make several paint washes.
Start by creating a few paint washes in small containers, mixing just paint and water. Anywhere from 1-3 washes seems to be the sweet spot.
The goal with the washes is to get varying degrees of saturation. I kind of mentioned this before, but this will create more depth in the final painting, but still feel cohesive. And it’s a pretty easy way to do that.
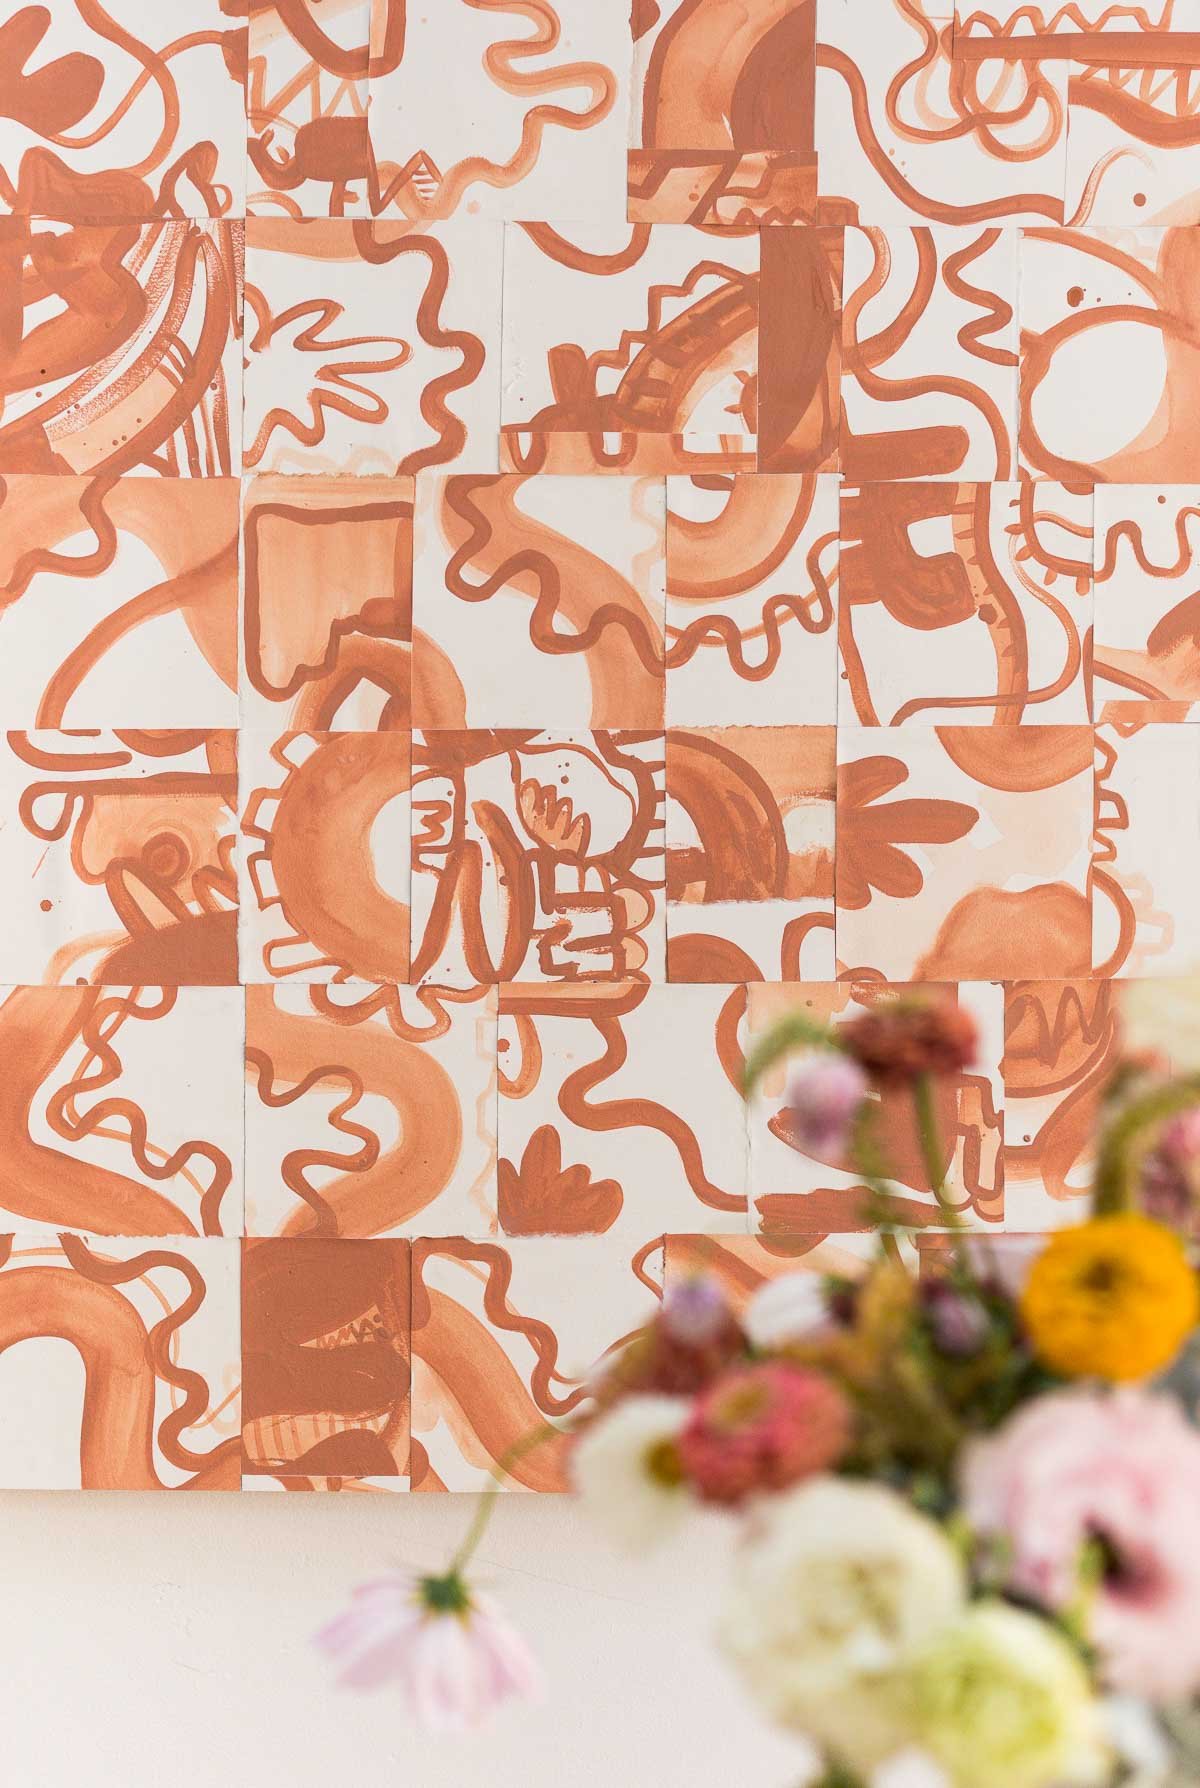
2. Paint abstract shapes and patterns onto paper.
Then begin painting abstract shapes, patterns, etc onto paper – in the washes you created in step one. If you’re struggling with what to paint, try a blind contour drawing to get started.
You’ll be cutting the paper into pieces later, so you don’t need to be precious or precise with this part of the process. *Depending on the desired size of your final art piece, you may need to repeat this process with multiple sheets of art paper.
3. Create grid lines along the back of each finished piece.
Wait for the paint to dry. Then flip the paper over to the back and use a ruler and pencil to create grid lines across the entire paper.
You can do this with squares or rectangles. And they can be as big or as small as you like.
Note: The smaller / closer together the grid lines are, the longer it will take to create the final piece.
4. Cut along the grid lines to create smaller squares or rectangles.
Next, cut along the grid lines that you created to form smaller pieces of paper, almost like puzzle pieces.
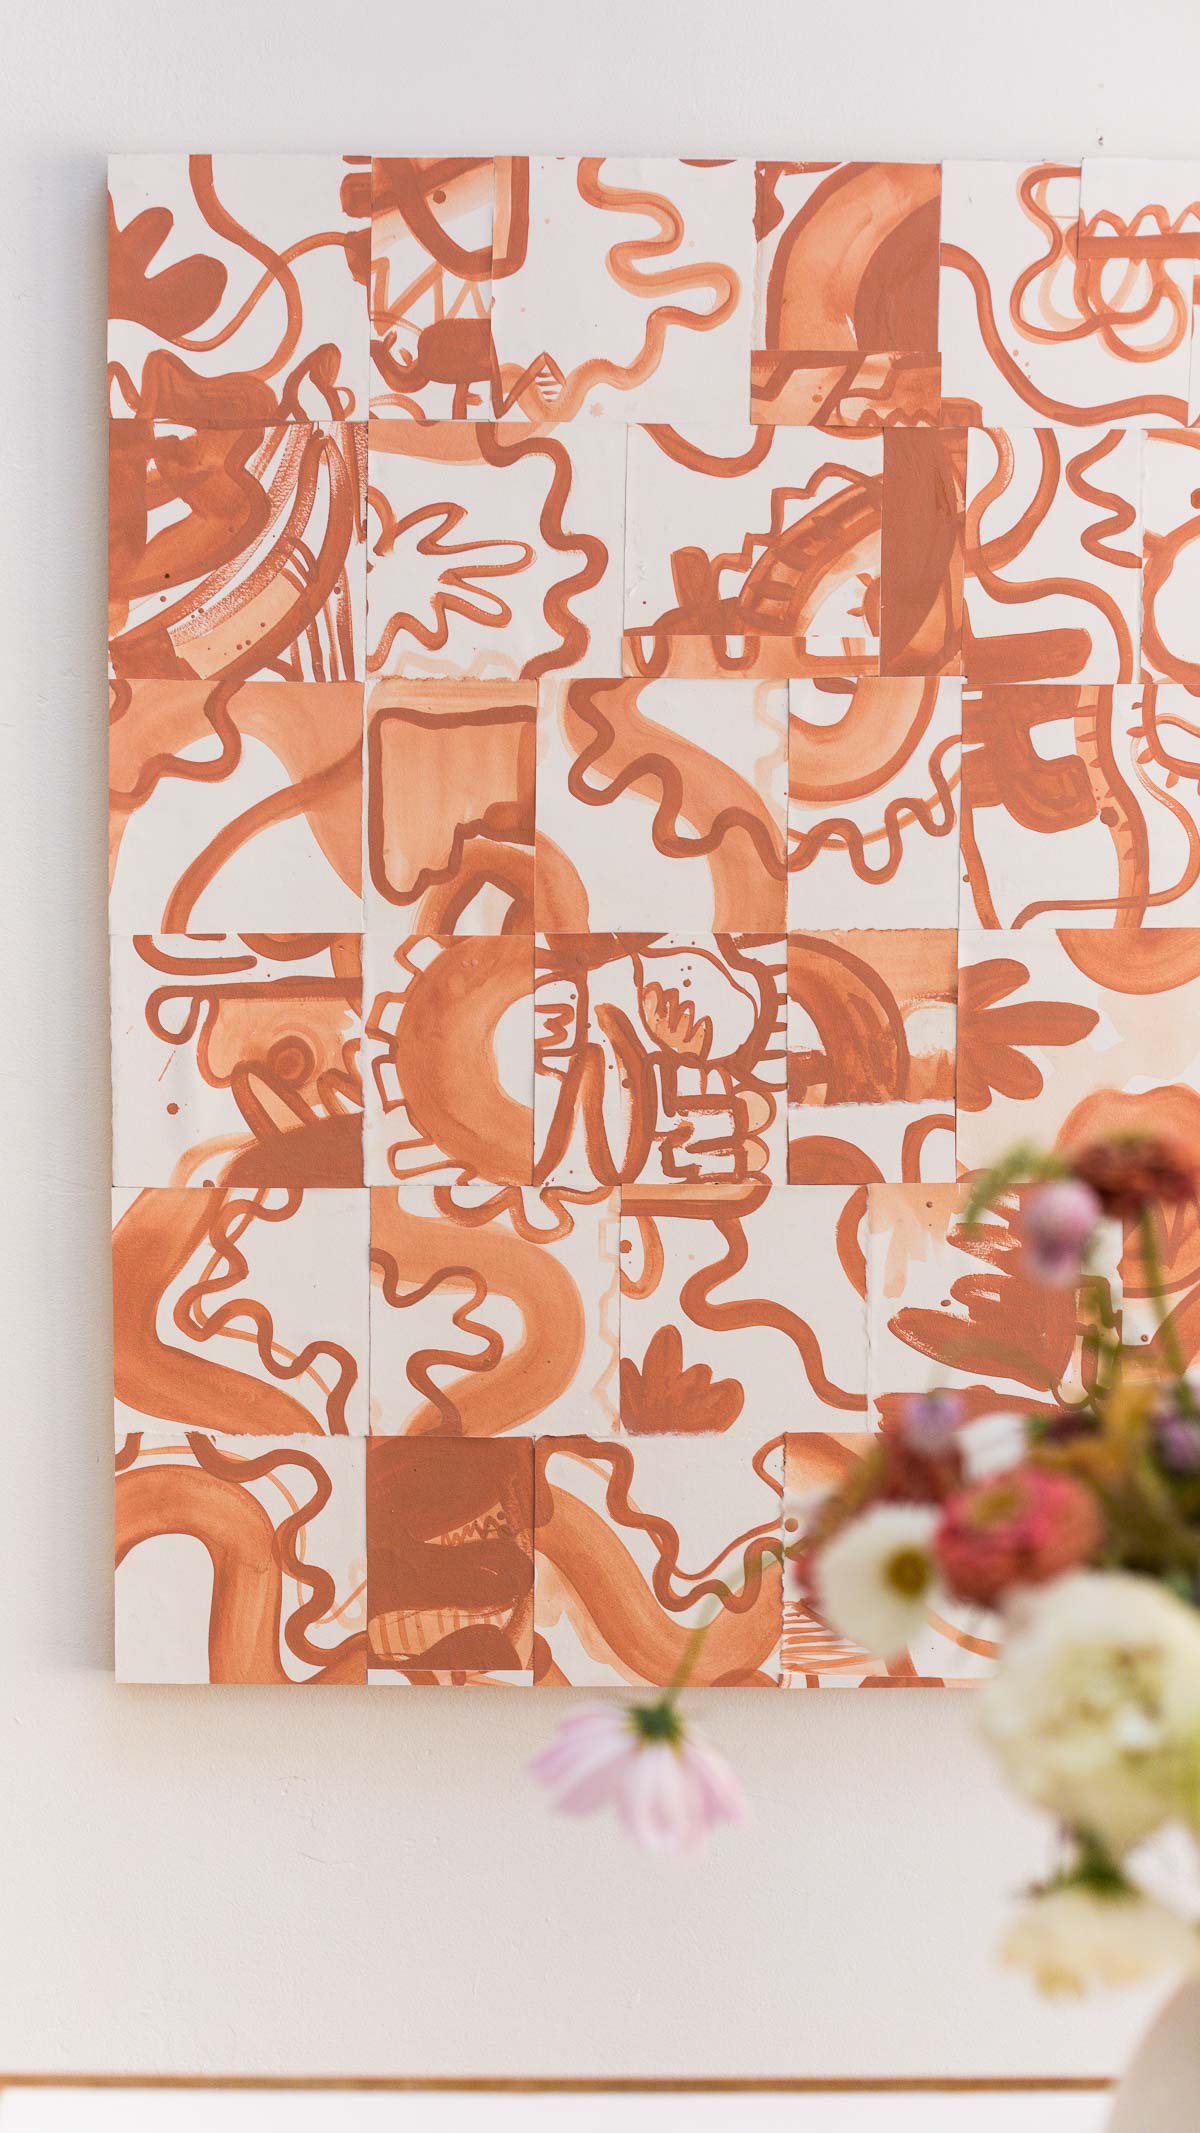
5. Rearrange the painted pieces.
Flip them back over and rearrange them in a new even more distorted, abstract pattern.
6. Glue the pieces down.
Once you’ve landed on a final look that you like, begin glueing them onto your cradled art panel or masonite in the order you’ve decided on.
I use matte medium as glue, because it creates a strong bond and is basically invisible once dry. But you can use regular craft glue as well.
7. Repeat this process until complete.
Repeat this process again and again until the panel is completely filled.
You can add a frame at this point, if desired. And it’s ready to hang.
Video Tutorial
Want more? I have a video tutorial for the exact project on Instagram, if you wanna check it out. I’m a visually learner, so if you are too, maybe a video will help.
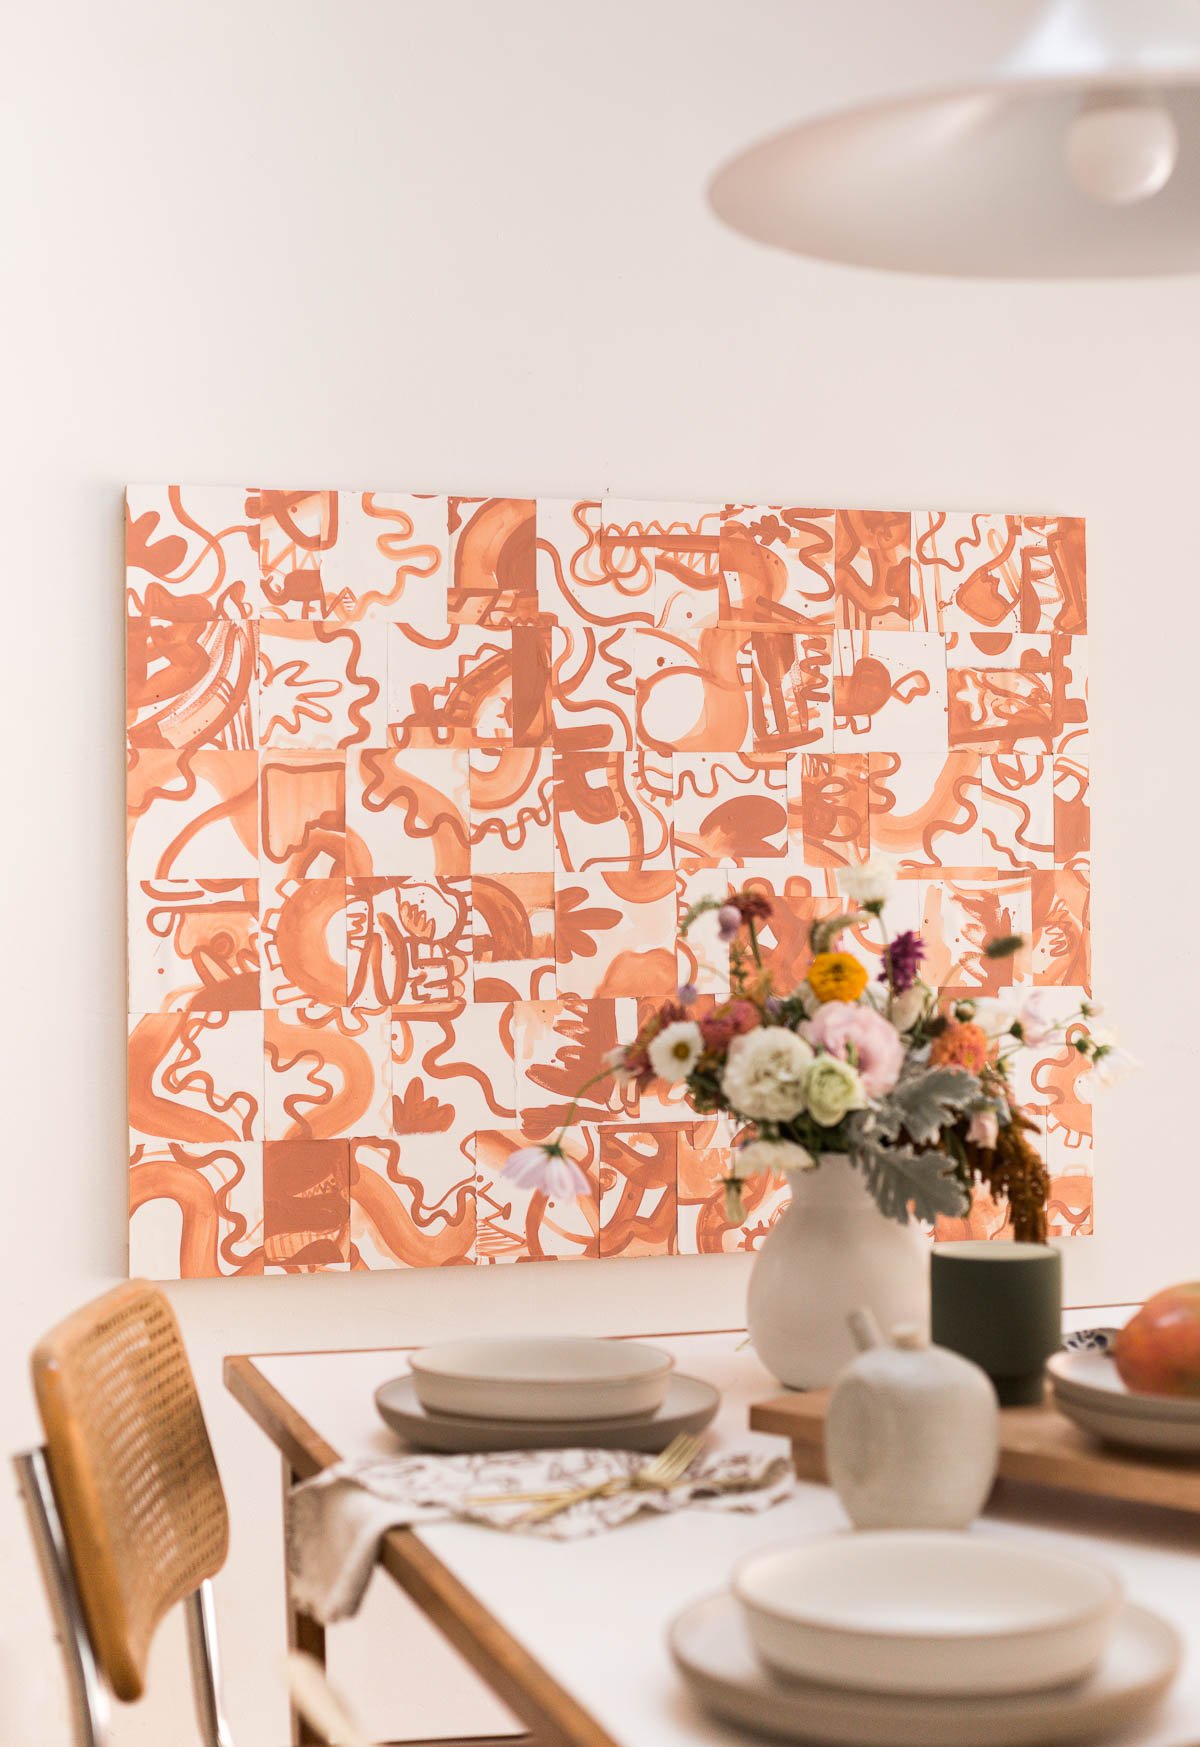
DIY Abstract Art Project: How to Make Large Artwork for the Wall
Inspired by patchwork quilts, I made a large scale painting that is truly so easy to recreate. Any scale, any color scheme, any skill level. Even kids can get in on the action for this one. Curious to see how it’s made? Click through for the tutorial.
- paint I used Canyon Ridge from BHG paint
- large heavyweight art paper 22×30 or larger I like Reeves BFK
- cradled art panel (or canvas), lightweight masonite, or scrap wood
- matte medium or glue
- water
Make several paint washes.
-
Start by creating a few paint washes in small containers, mixing just paint and water. Anywhere from 1-3 washes seems to be the sweet spot.
-
The goal with the washes is to get varying degrees of saturation. I kind of mentioned this before, but this will create more depth in the final painting, but still feel cohesive. And it’s a pretty easy way to do that.
Paint abstract shapes and patterns onto paper.
-
Then begin painting abstract shapes, patterns, etc onto paper – in the washes you created in step one. If you’re struggling with what to paint, try a blind contour drawing to get started.
-
You’ll be cutting the paper into pieces later, so you don’t need to be precious or precise with this part of the process. *Depending on the desired size of your final art piece, you may need to repeat this process with multiple sheets of art paper.
Create grid lines along the back of each finished piece.
-
Wait for the paint to dry. Then flip the paper over to the back and use a ruler and pencil to create grid lines across the entire paper.
-
You can do this with squares or rectangles. And they can be as big or as small as you like.
-
Note: The smaller / closer together the grid lines are, the longer it will take to create the final piece.
Cut along the grid lines to create smaller squares or rectangles.
-
Next, cut along the grid lines that you created to form smaller pieces of paper, almost like puzzle pieces.
Rearrange the painted pieces.
Glue the pieces down.
-
Once you’ve landed on a final look that you like, begin glueing them onto your cradled art panel or masonite in the order you’ve decided on.
-
I use matte medium as glue, because it creates a strong bond and is basically invisible once dry. But you can use regular craft glue as well.
Repeat this process until complete.
-
Repeat this process again and again until the panel is completely filled.
-
You can add a frame at this point, if desired. And it’s ready to hang.
[ad_2]